Getting started with Open IRIS
Sign in to Open IRIS
You can sign in to the IRIS portal, if one of the following applies:
- You belong to the organization
- You have access to one provider or resource
- You are a task owner
- You are an admin of something
- If the portal settings allow an unrestricted access
If none of this applies to you, please contact the portal administrator.
To sign in open the OpenIRIS website in your browser. Then click on "Sign in / Register".

A window will open, where you have to enter your registered email address and afterwards your password.

After completing the sign in you will be directed to the Open IRIS portal.
ATTENTION: The login process can change between institutes because some use their institute single login authentication!
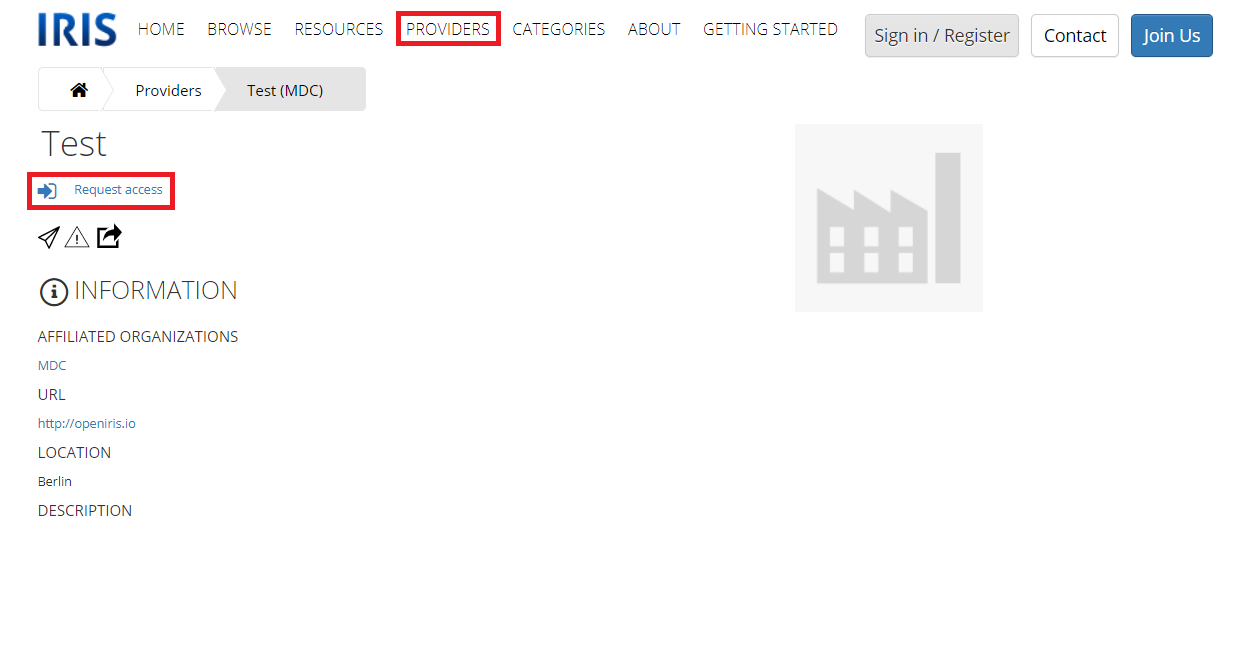
Request outside access
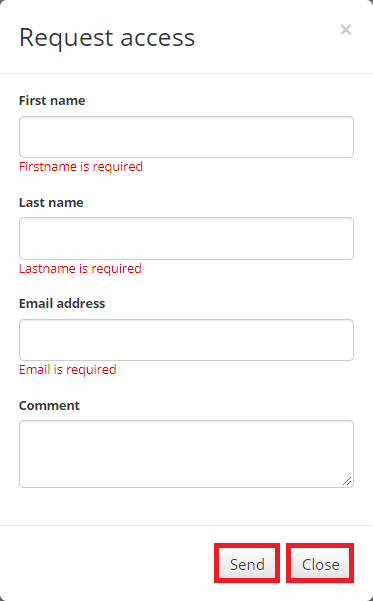
For some provider it is possible to request access to it via the external provider list. This list is visible without a login to Open IRIS. This way everybody can request access even without an existing Open IRIS account.To do this you need to select a provider on the external provider list. If the provider enables an outside access request, there should be a button below the name of the provider called “Request access”. After clicking on it a new window will open asking for your first name, last name, email address and a comment. Be sure to enter a valid email address since you will be informed there if the status of your request changes.
First steps in IRIS
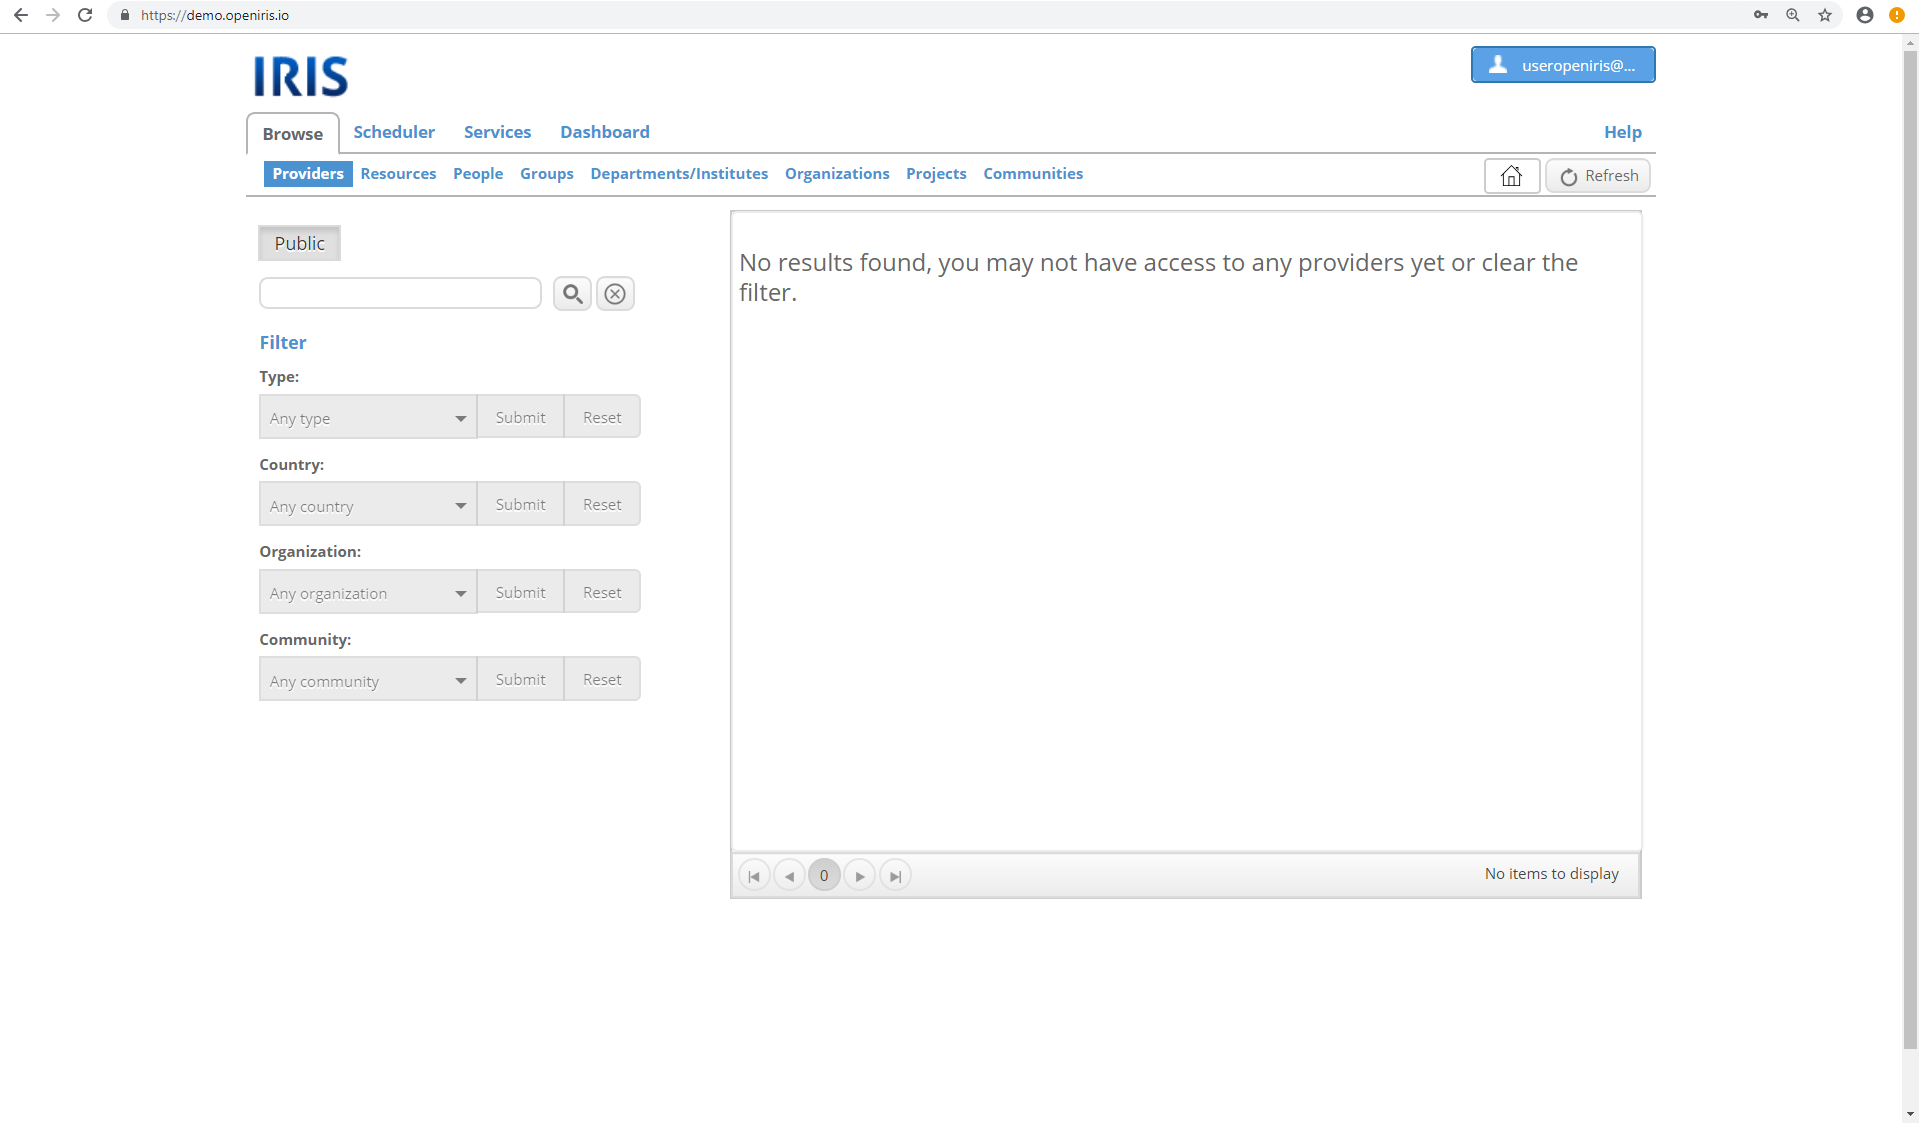
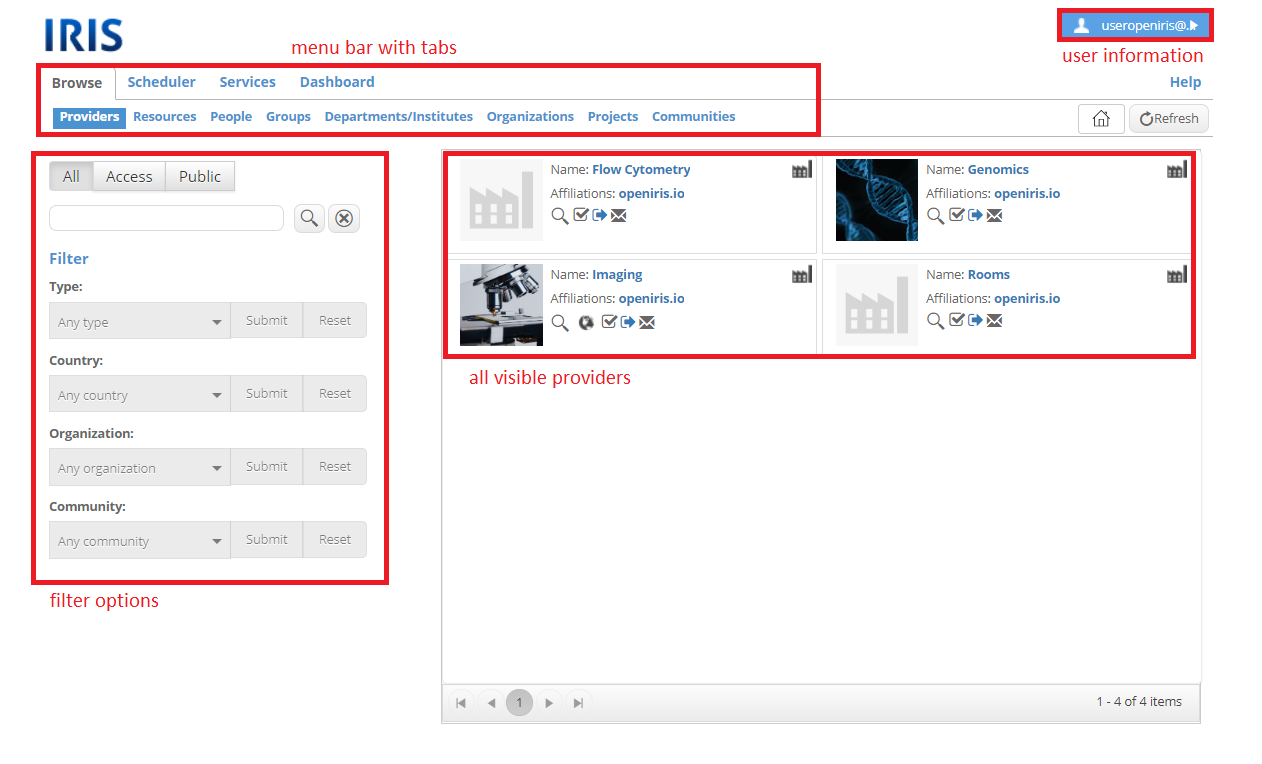
Browse tab
Now you are finally logged into the Open IRIS portal. First you will probably land at BROWSE.PROVIDER. There all providers visible to you are listed. You have options to filter them on the left part of your screen. On top there is a menu bar with the four tabs "Browse". "Scheduler", "Service" and "Dashboard". If you are an admin to any resource, provider, organization, ect. a fifth tab called "AdminAdmin tab" will appear. Each tab contains some sub-tabs to navigate through Open IRIS.
In the top-right corner a blue field is displayed showing your sign-in email address. By clicking on it you have the options to view your profile ("Profile") or log-out of Open IRIS ("Logout"). After clicking on "Profile" another window will open where you can for example change your password, view your memberships or add social media accounts.
Just below your personal information you can find some other useful buttons. The blue tab "Help" opens the help page of your IRIS portal. Further information about Open IRIS can also be found in this wiki. Below the "Help" tab three other buttons can be found:
- The "House" button: Locks the current page as start page (the page that appears after log-in)
- The "Lock" button: Locks the current layout and filter settings (every time this page is called the locked layout and filter settings appear as default)
- The "Refresh" button: Refreshes the current page

The BROWSE.RESOURCES tab looks very similar to the BROWSE.PROVIDERS tab. It has the same layout and mostly the same filter options. But instead of all visible providers, it lists all resources visible to you. Resources can have different classes. Most equipment has the class "Scheduled". Additionally there is the class "Service" for any kind of services that a provider provides. Additional classes are "Application", "Event" and "Add-on". More on resources and how you can book them can be found here.
There are more possible sub-tabs for "Browse". Please note that they might not all be visible to you. Most of them are self explanatory. For example the BROWSE.PEOPLE tab contains all persons affiliated to your portal. There you can search for an email address or social media contact. The BROWSE.GROUPS tab contains all groups of you affiliated portal. You can filter to see all or just the ones you are a member of. The BROWSE.ORGANIZATIONS tab features all IRIS organizations you are a member of.
Scheduler tab
In the "Scheduler" tab all visible resources of the class "Scheduled" are listed. There are three different views available:
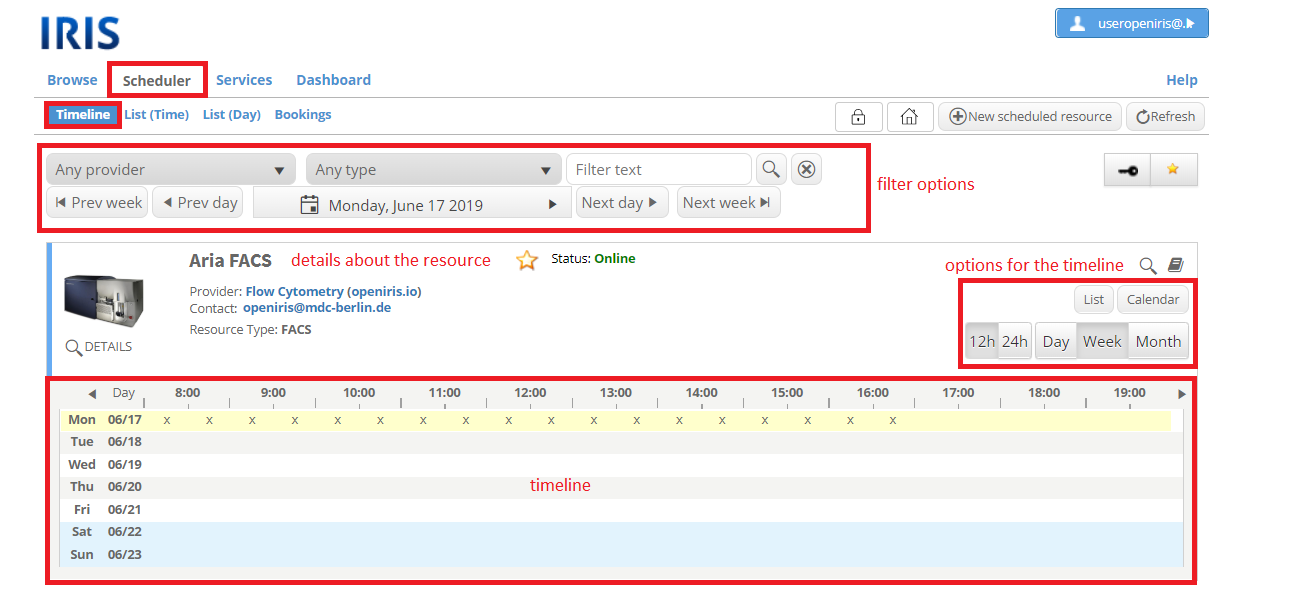
- The sub-tab "Timeline" lists every resource with its symbols and its timeline. The timeline can be displayed in a 12 or 24 hours format and for a day, a week or a month. This way empty timeslots can easily be found. Additionally it is possible to filter the resources according to provider or type and with free text. This makes it easy to find the wanted resource. To understand the timeline a short explanation of the symbols and colors is necessary: The “x” symbol means that the timeslot is not bookable (mostly because it is already elapsed). The background color yellow is only used for the current day while the background color blue is used for the weekends. The other weekdays are indicated in white or grey. Your own bookings are shown in blue, others appear in green. More colors are possible if more booking types exist.
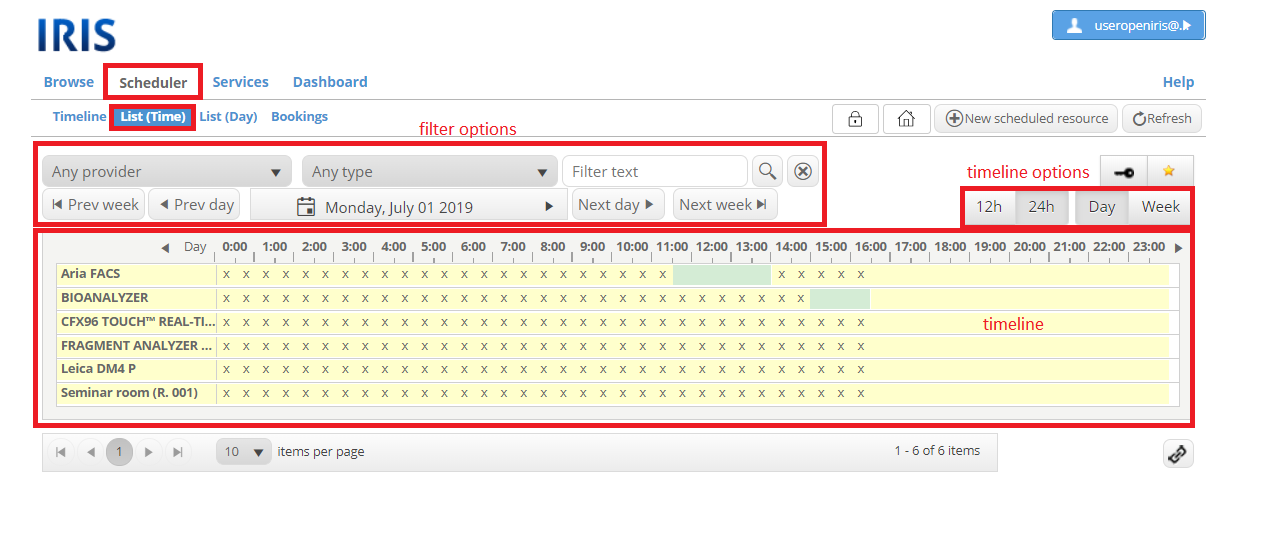
- The sub-tab "List (Time)" lists the timelines of all resources without the details. It is possible to display the timeline in a 12 or 24 hours format for a day or a week. With this view it is very easy to find a free resource for a desired timeslot. Again it is possible to filter the resources according to provider or type and with free text. The symbols and colors of the timeline have the same meaning as in the sub-tab "Timeline".
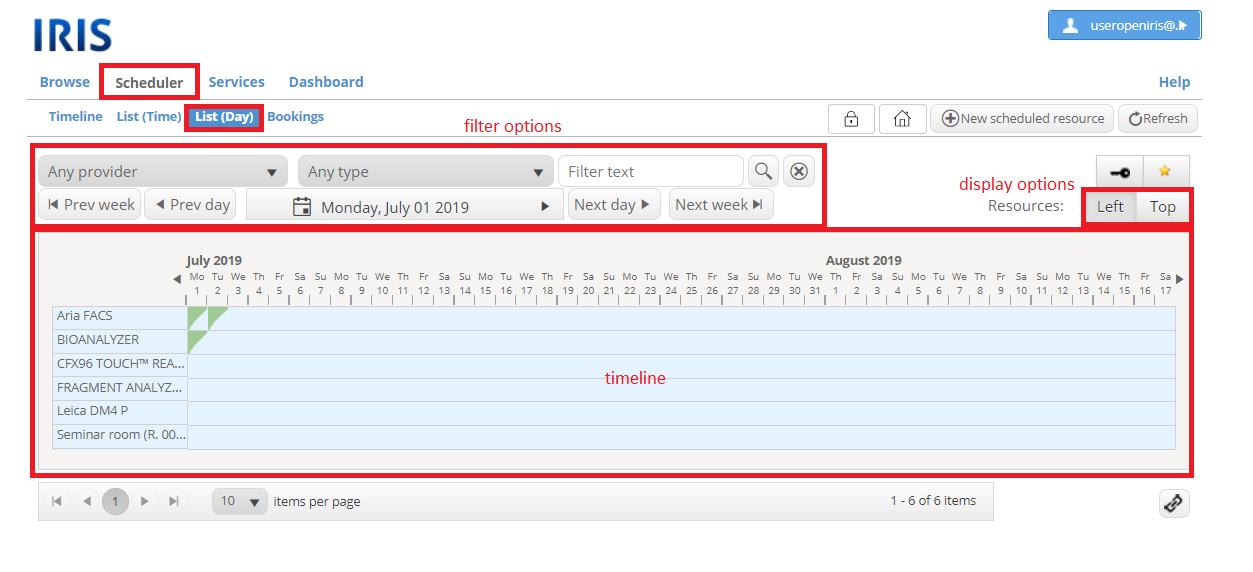
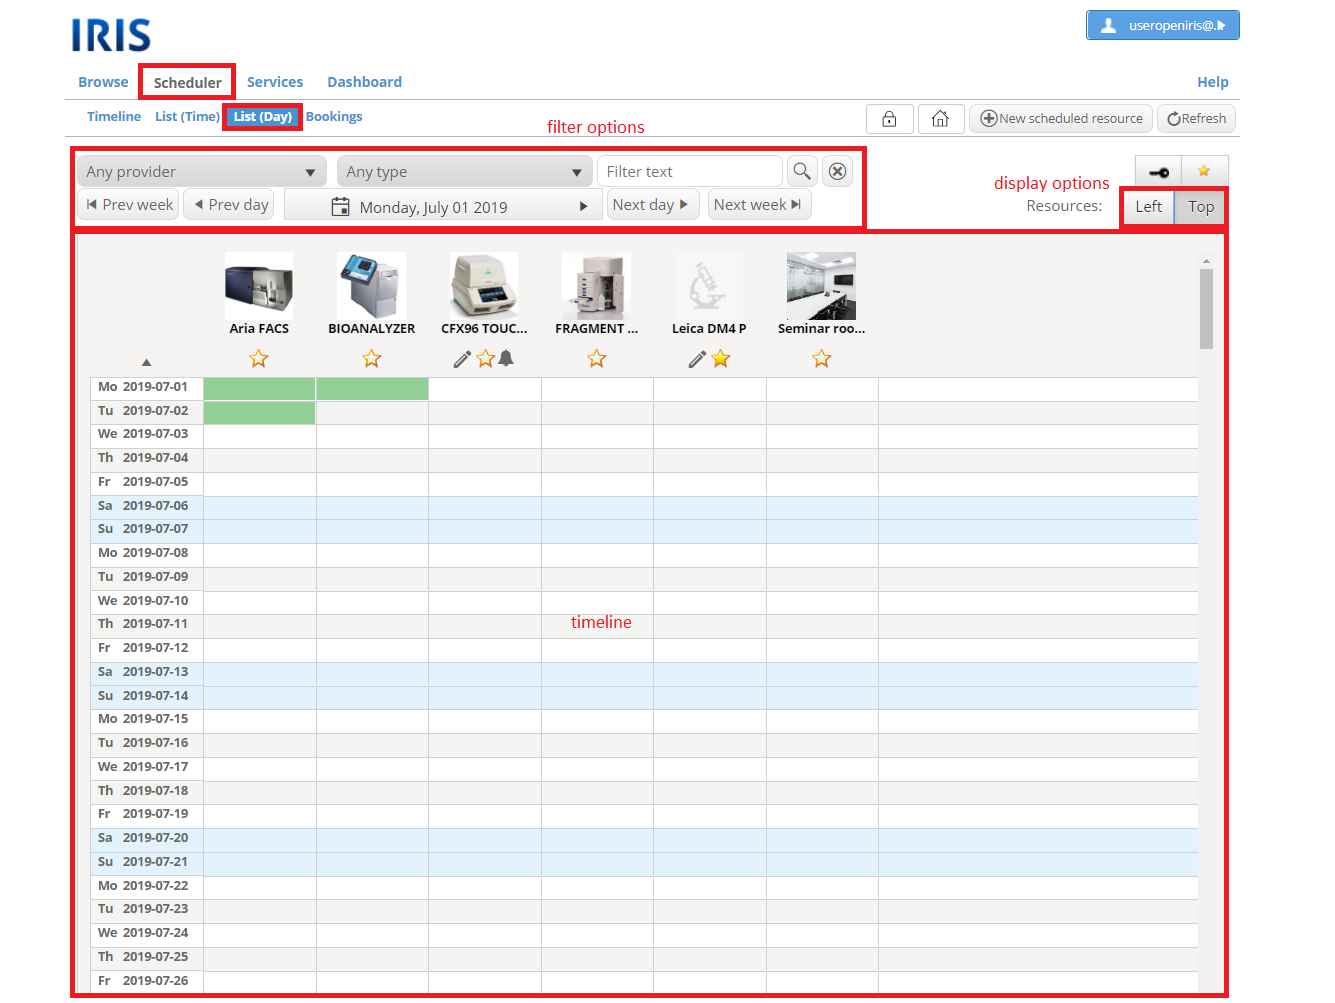
- The sub-tab "List (Day)" again lists the timelines of all resources without the details. But here the timeline does not represent a day divided into slots of half an hour. Here, each part represents a day. In the left view the blue background means that there are currently no bookings, a green triangle means that there is at least one booking and a green square means that the resource is completely booked the whole day. In the top view the resources are listed on top. Each day which contains at least one booking is marked in green. If the day contains one booking of you the day is marked in blue.
To read more on scheduled resources and how to book them click here. Every one of your bookings, independent of their status, is listed in the sub-tab "Bookings".
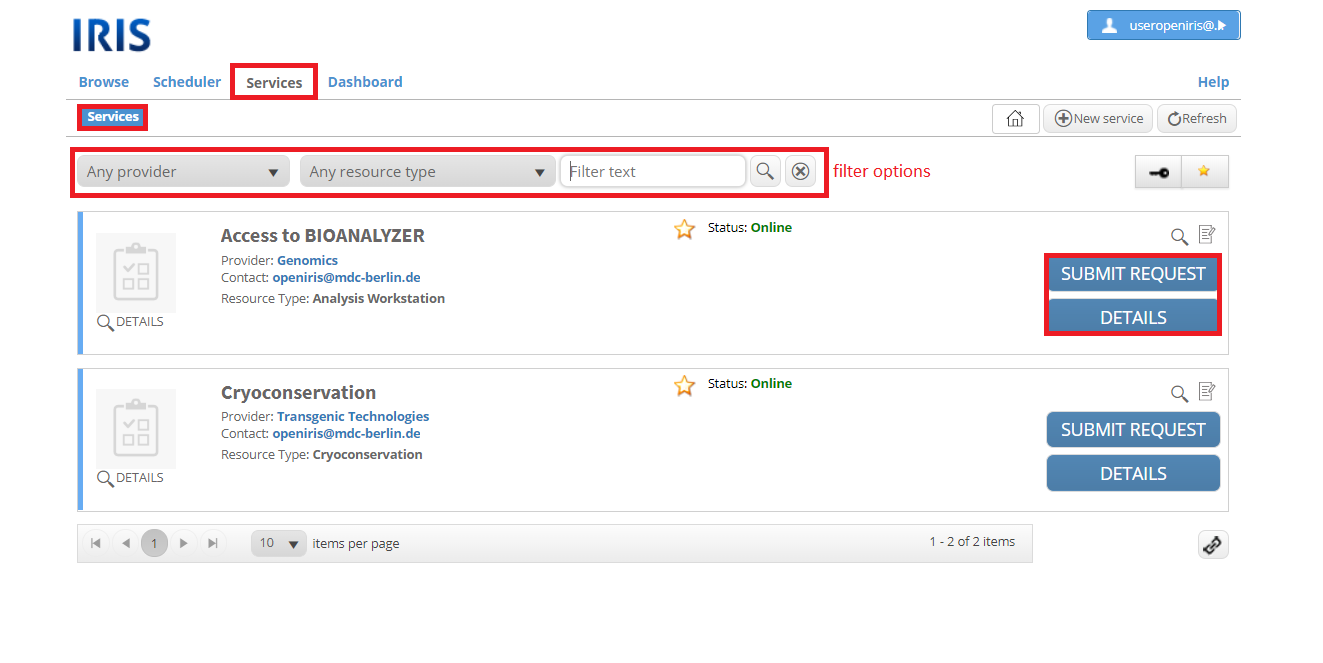
Service tab
In the "Service" tab all visible resources of the class "Service" are listed. It is possible to filter the services according to provider or type and with free text. Services cannot be booked. If you have access to them, you are able to send a service request. Details of a service are displayed after clicking on the "Details" button.
Dashboard tab
The tab "Dashboard" is explained here in more detail.
Symbols
Each provider and resource displays different symbols around it. In Open IRIS most objects and buttons have a mouseover effect. Therefore, a short description of this object or button will appear if your mouse ‘hovers’ over it. A short description of the symbols can also be found here:
Symbol | Name | Description |
|---|---|---|
| Magnifying glass | Open window with more detailed information |
| Envelope | Contact the administrator |
| Arrow | Need to request access |
| Lock (resources or povider) | No access |
| Public | Publicly visible without access |
| Memo | Submit request for service or project. You will be asked to fill out a form |
| Tick mark | Have access (but still might need training to book this resource) |
| Red clock | You are able to book this resource but it is not available right now (mouseover shows next available timeslot) |
| Green clock | You can book this resource and it is available |
| White clock | You can book this resource but no information on availability |
| Grey clock | You are not able to book this resource, this might be because you have no access or need training |
| Clock with red x | Resource is offline and therefore not bookable |
| Key | Enabling only shows resources you have access to |
| Microscope | Scheduled resource |
| Tool | Application |
| Clipboard | Service |
| Gear Wheel | Edit (only visible to admins) |
| White fields | Distribution list (only visible to admins) |
| Star | Marks this resource as a favorite you can filter for (with a click the star appears filled out and is now marked as a favorite, another click removes resource from favorites) |
| Permalink | Shows the permalink to this page |
| Bell | Option to subscribe to notifications about new bookings, changed bookings and/ or deleted bookings of a resource |
| Book | You need to be trained in order to book the resource. A training request can be send by clicking on the symbol. |
| Pen | |
| Red star | Mandatory field (needs to be filled out in order to submit the form) |
| Lock (menu bar) | Lock current layout and filter settings |
| Home (menu bar) | Lock current page as start page (page that appears after the log in) |


