Billing
General information
Billing enables you to create price types and price lists for your fees and services. This makes it easy to keep track of all priced activities of your users in Open IRIS. Everything concerning the billing can be handeled in ADMIN.BILLING. This tab is not always visible since by default billing is not enabled.
Enable billing
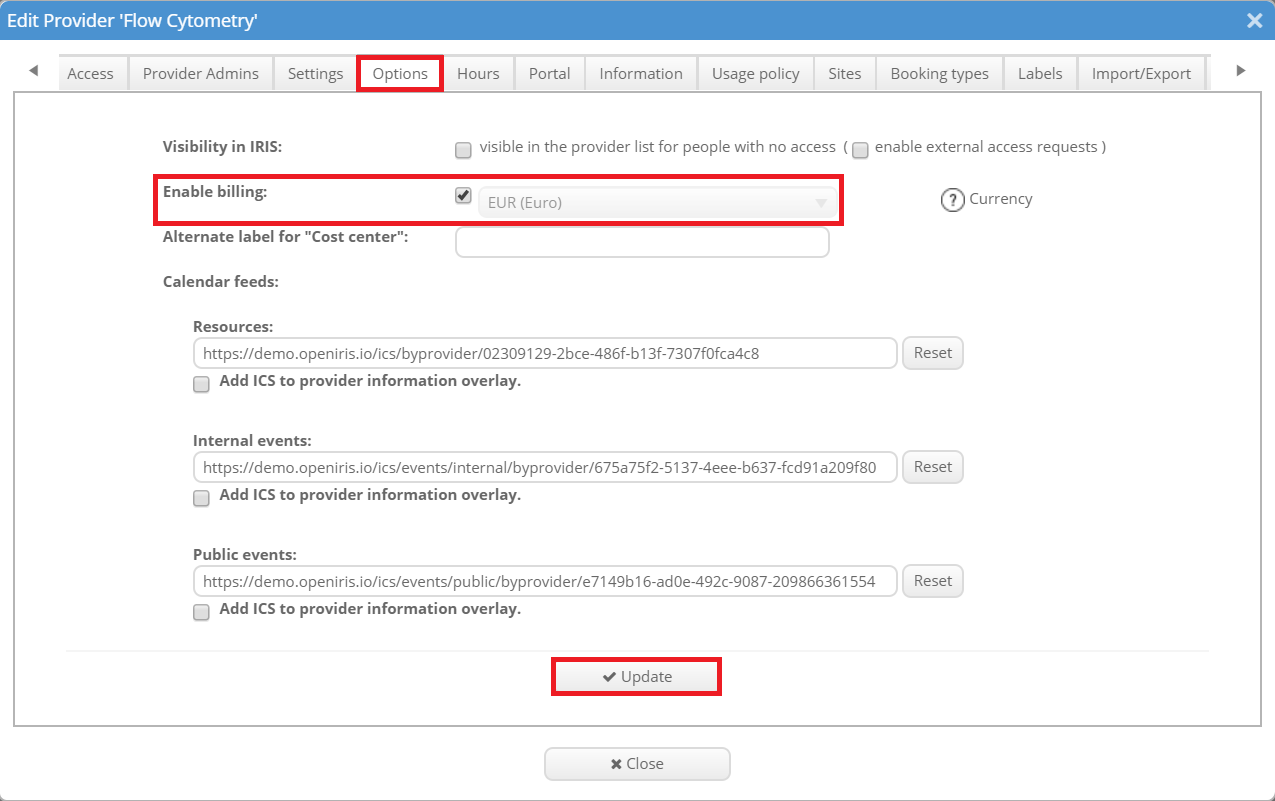
By default billing is not enabled in the system for resources providers. to enable it you must open the "Options" tab of the provider settings and select "Enable billing" together with your currency. Remember to click "Update" after to save the settings. Now the Admin tab should feature the new sub-tab "Billing".
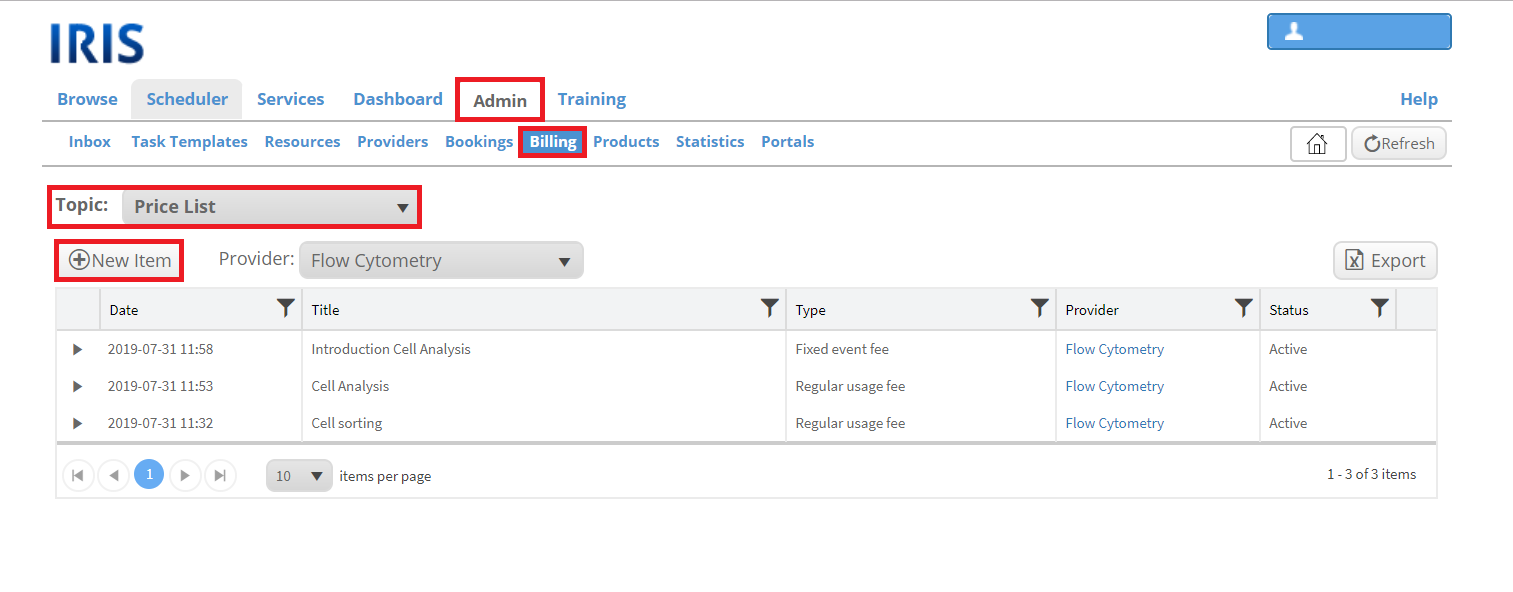
Topic: Price List
This topic lets you define pricing rules for the usage of your resources.
By clicking on “New item” a new window will open. There you need to choose a provider (only if you are an admin of multiple providers) and a pricing type.
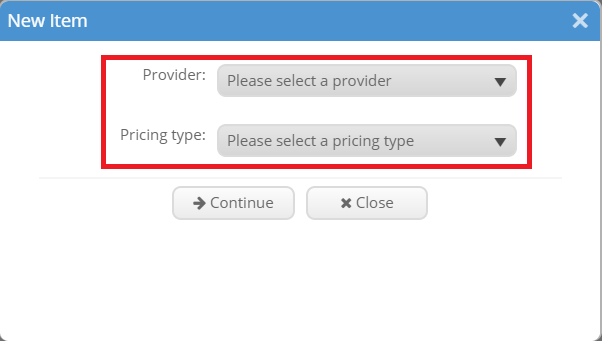
The pricing types to choose from are:
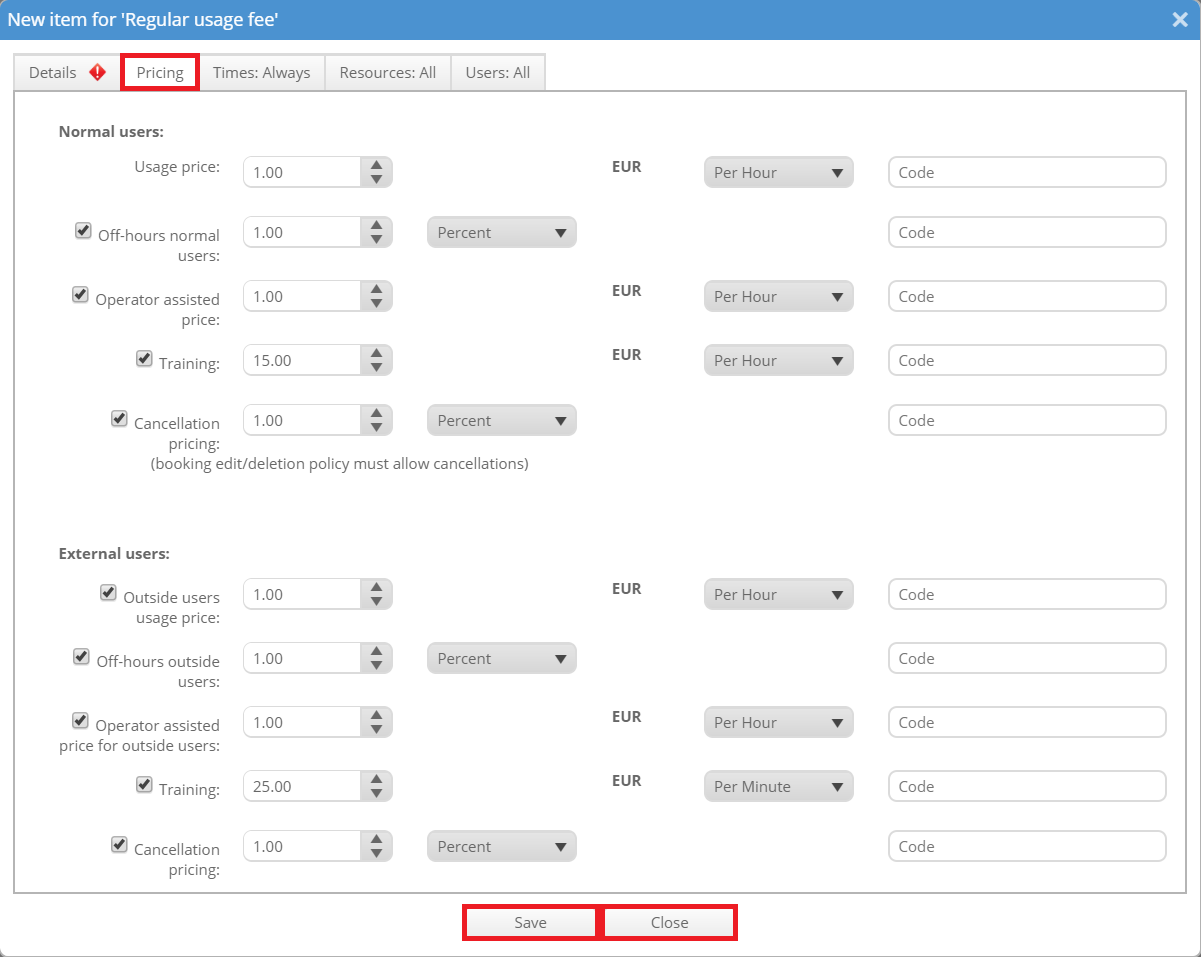
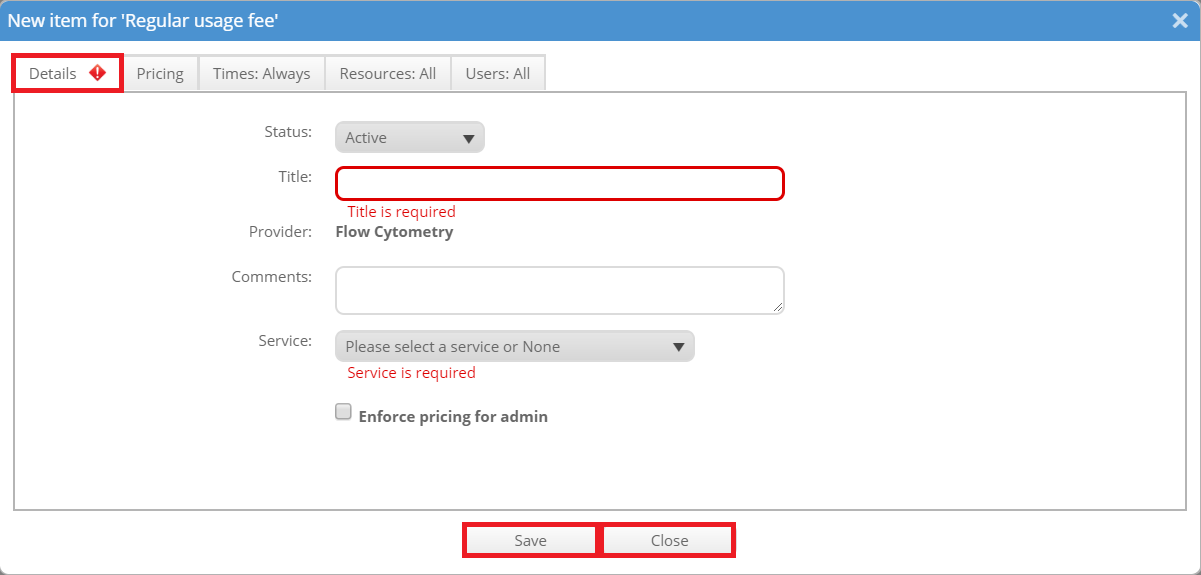
1) Regular usage fee
This type is used to price a usage fee. It can be attached to an existing service of a provider or not. There are several pricing types which are divided into normal users and external users. You need to add an “usage price” (the rate that is charged to use the resource), all other variants are optional and can be added by ticking the box next to it. There are options for “off-hours” (price outside of the hours defined in the "Times" tab), “operator assisted” (price for operator assisted bookings if that option is enabled), “training” (fee charged for training) and “cancellation” prices (fee for cancellations of a booking, this can be selected as a fixed price or a percentage).
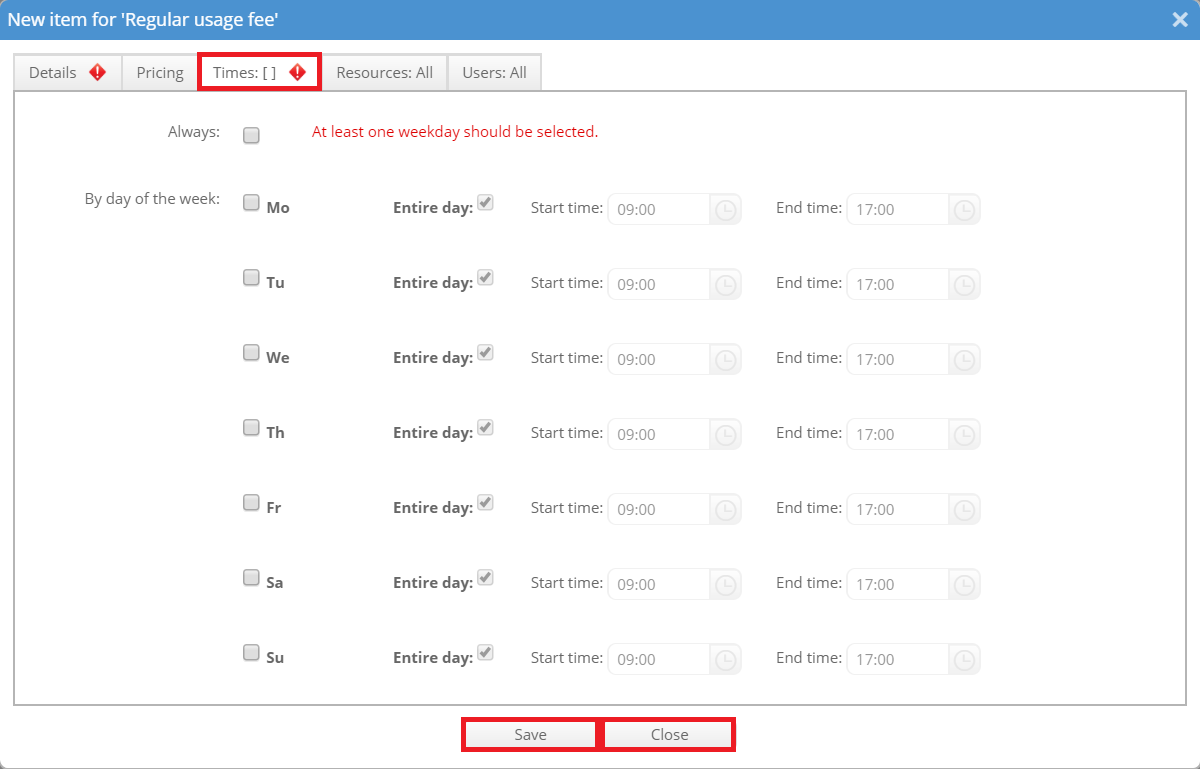
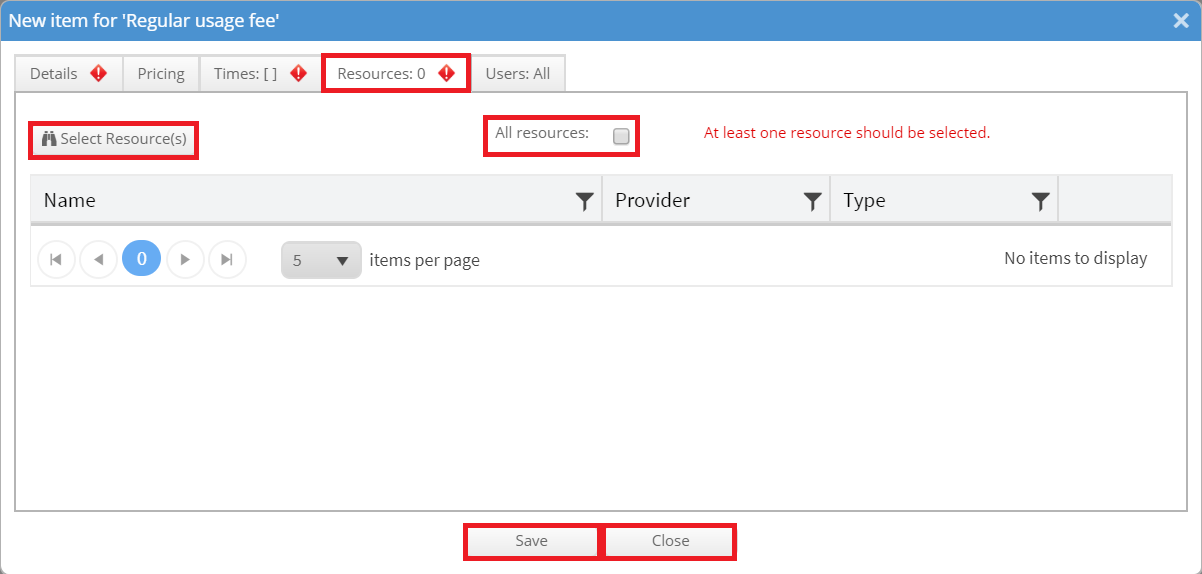
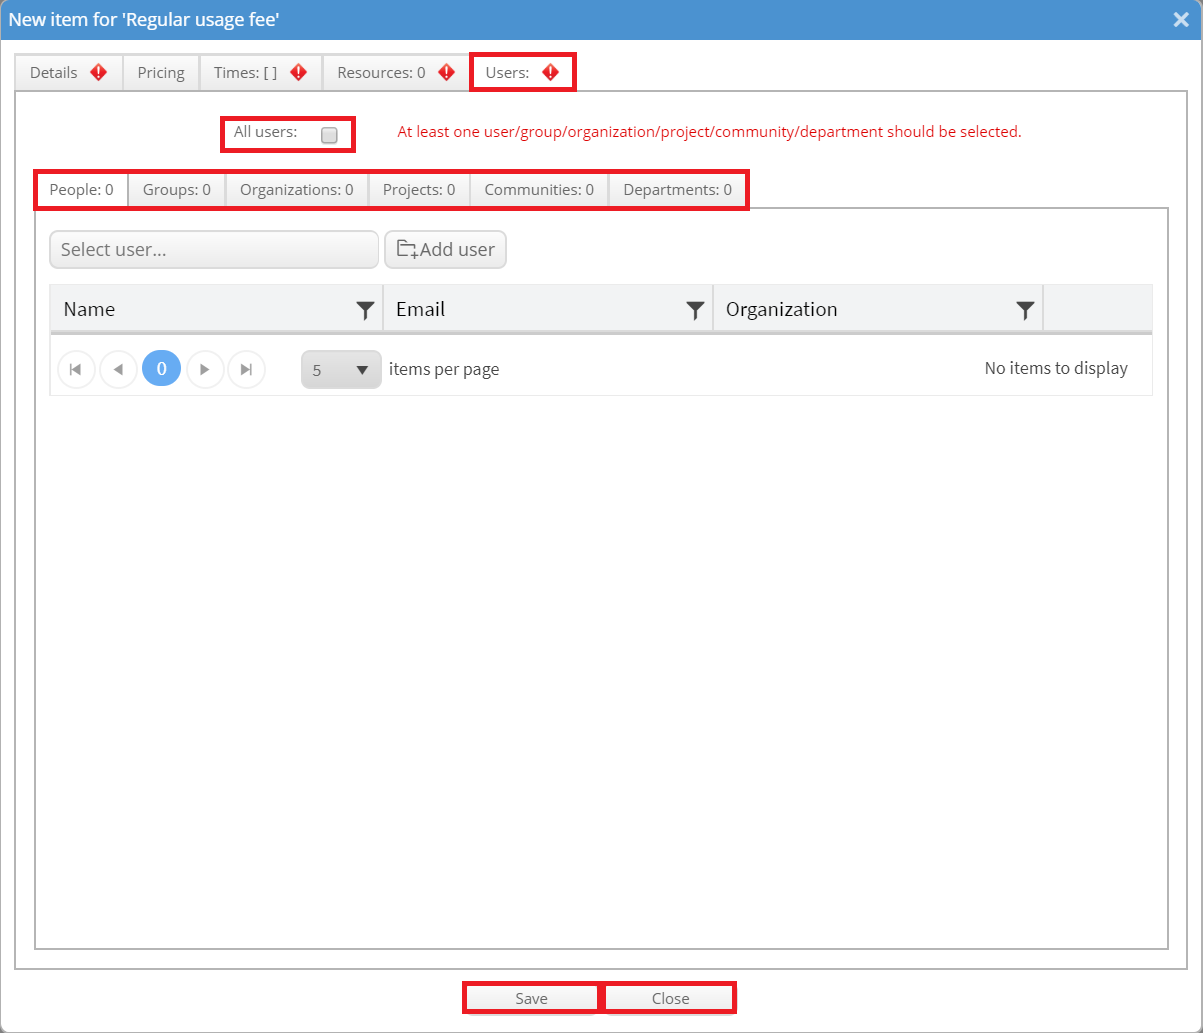
Normal users are the users defined in the "Users" tab, external users are all users that fall outside of that. Additionally times for that fee can be selected. You need to either choose always or the specific days. Also the resources and users for which this fee applies, can be selected.
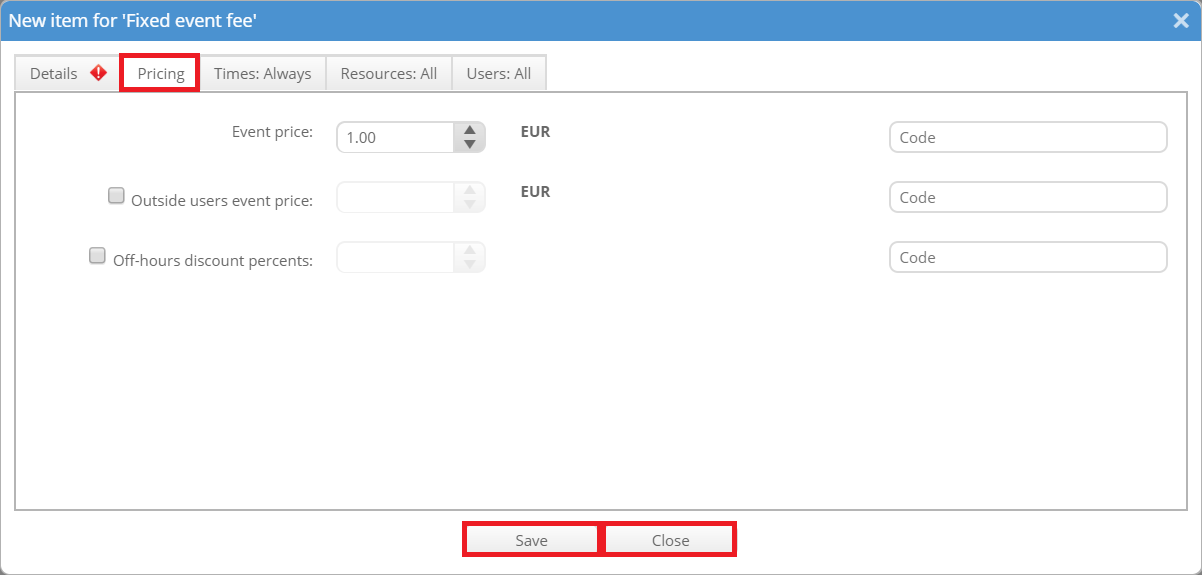
2) Fixed event fee
This type can be used to establish a fiixed fee for an event.
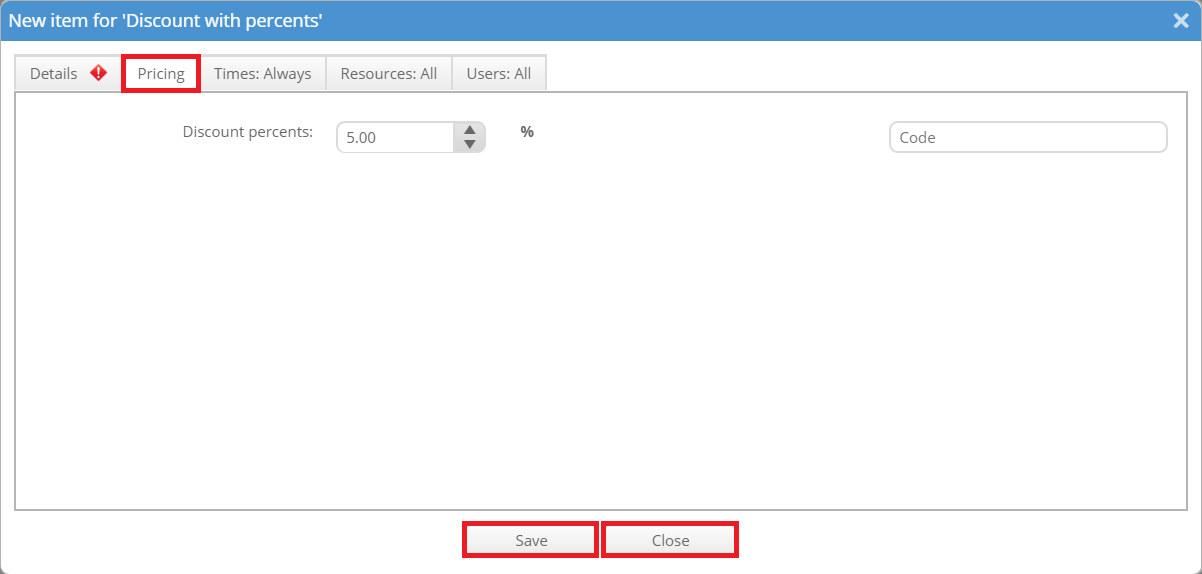
3) Discount with percents
This type allows you to give a discount on specific times, resources and/or users as specified in their respective tabs. The discount is given in percents.
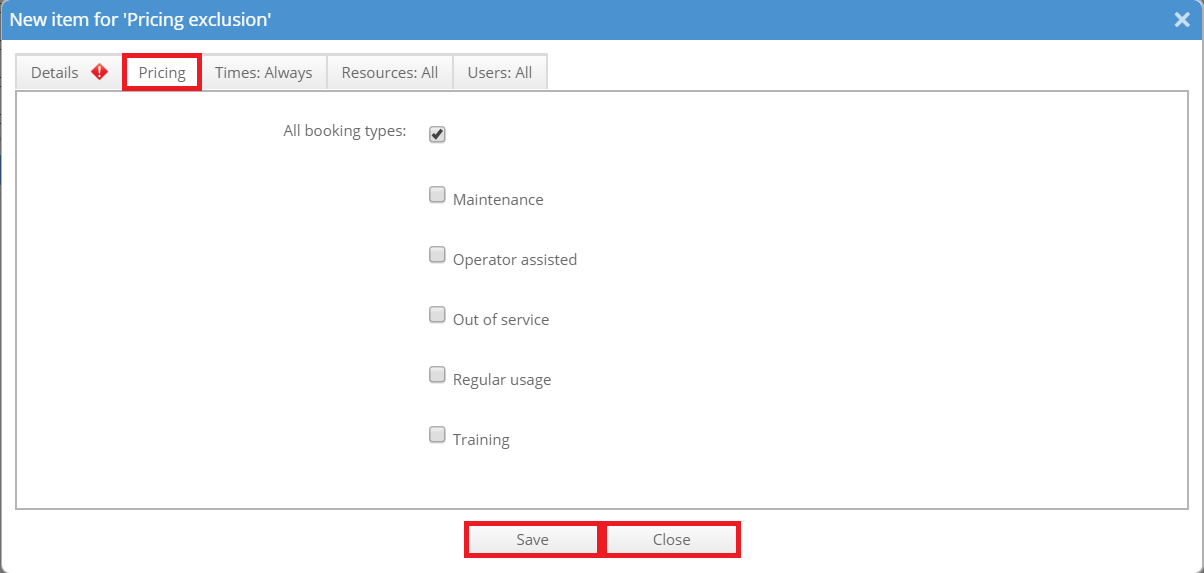
4) Pricing exclusion
This type allows you to exclude specific booking types from pricing. This is for example useful if training should not be priced.
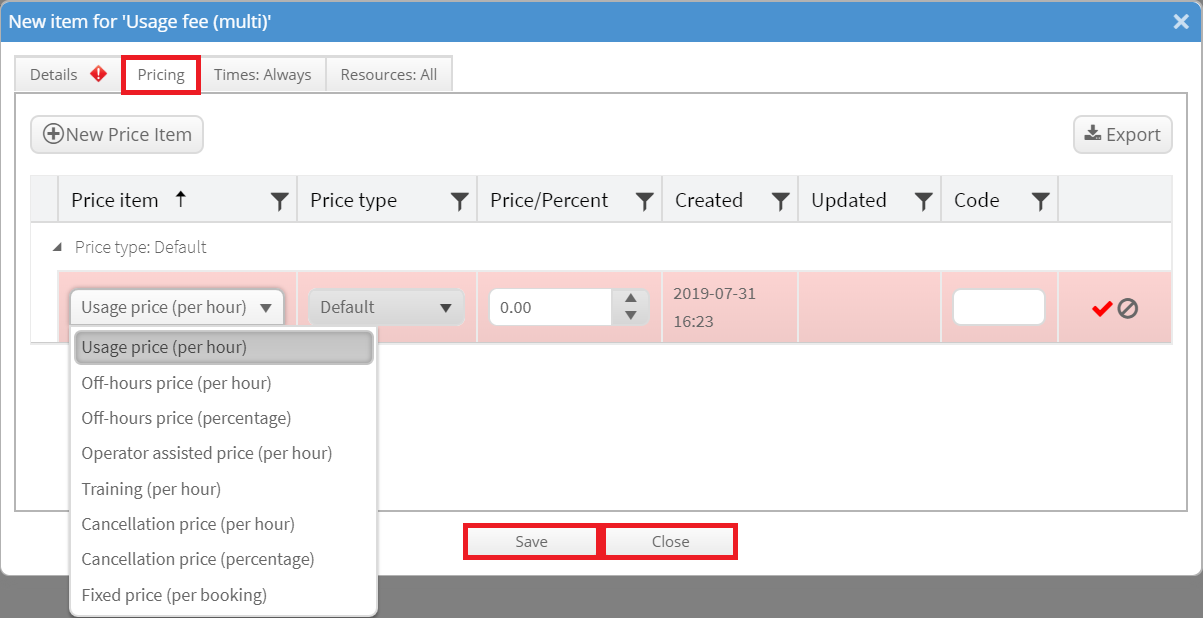
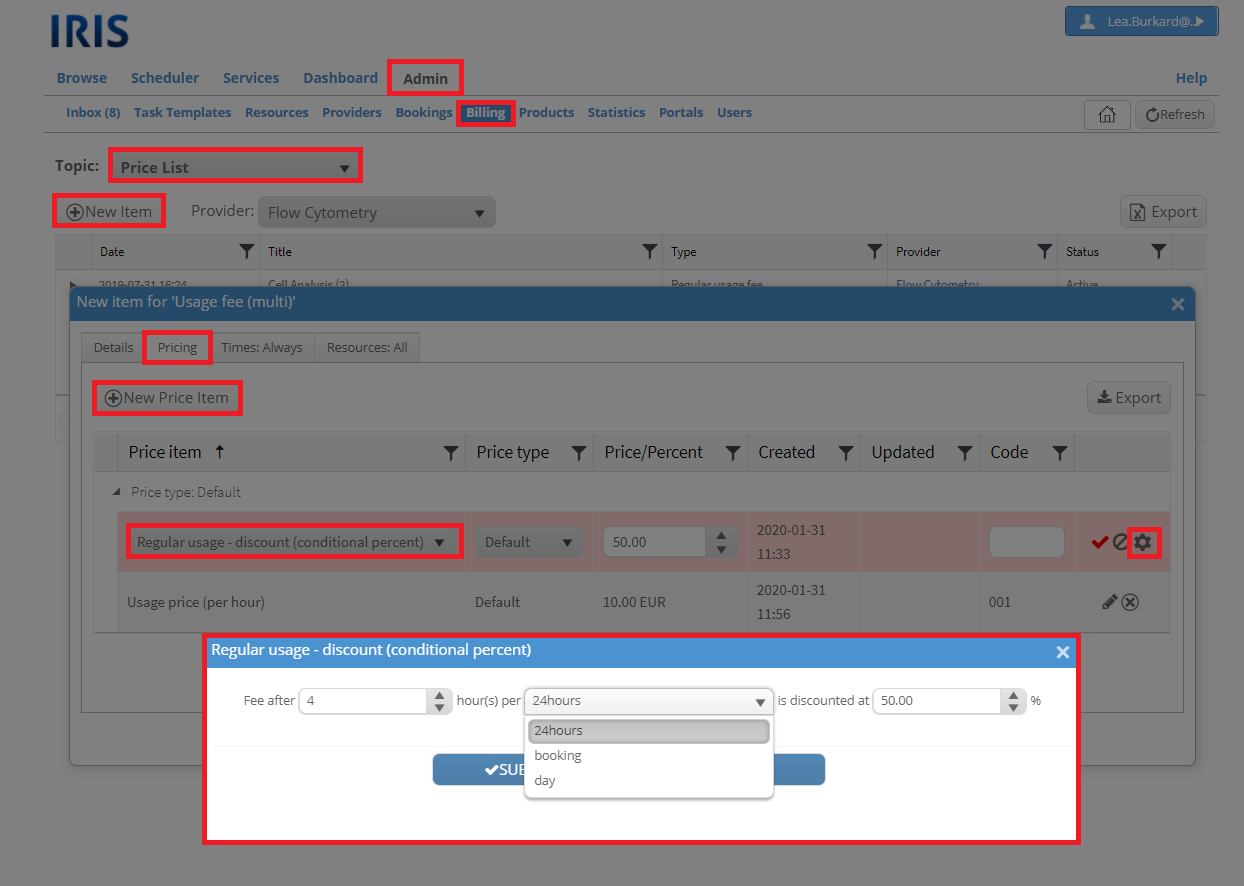
5) Usage fee (multi)
This feature allows you to define multiple price items in one. To add a new price item in the usage fee click on "New Price item". Now a new line marked in red appears. There are multiple price items to choose from. They are the same as described in the regular usage fee. Here, it is not possible to select specific groups of users. Instead you can select a price type which is a defined set of people. This set of people can be defined in the topic "Price Type" (described in more detail later in this article). Then the price or the percentage needs to be entered and a code. This item can then be created by clicking on the check mark symbol or deleted by clicking on the crossed circle symbol. Do not forget to additionally press "Save" afterwards to save all changes.
In general you have the following tabs for each fee: "Details" (general information), "Pricing" (define the pricing, this tab varies the most between the diffenent types), "Times" (define the work hours), "Resources" (use the resource picker to define what resources the prices apply to), "Users" (define the normal users of this price fee). For each new defined price item it is possible to enter a code.
In the usage fee (multi) it is now also possible to enable discounts. They can be set for every price type but also need additional conditions which need to be set in an extra window that can be accessed via the gear wheel symbol. Without these additional conditions it is not possible to save the price item.
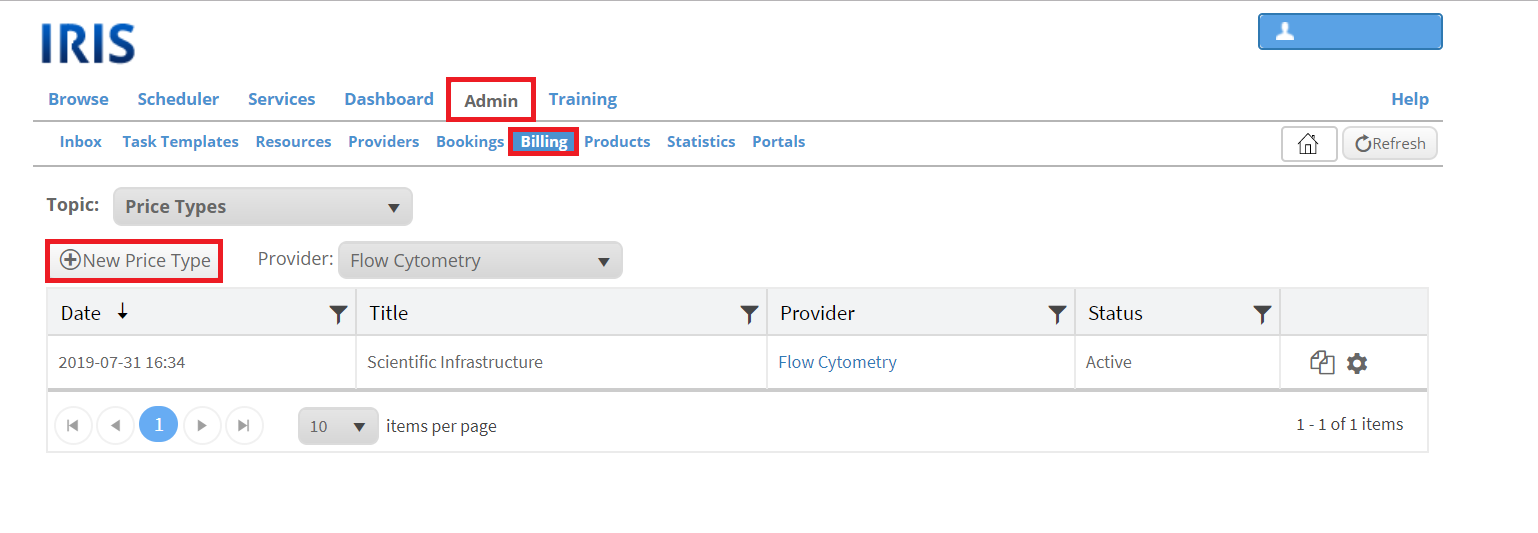
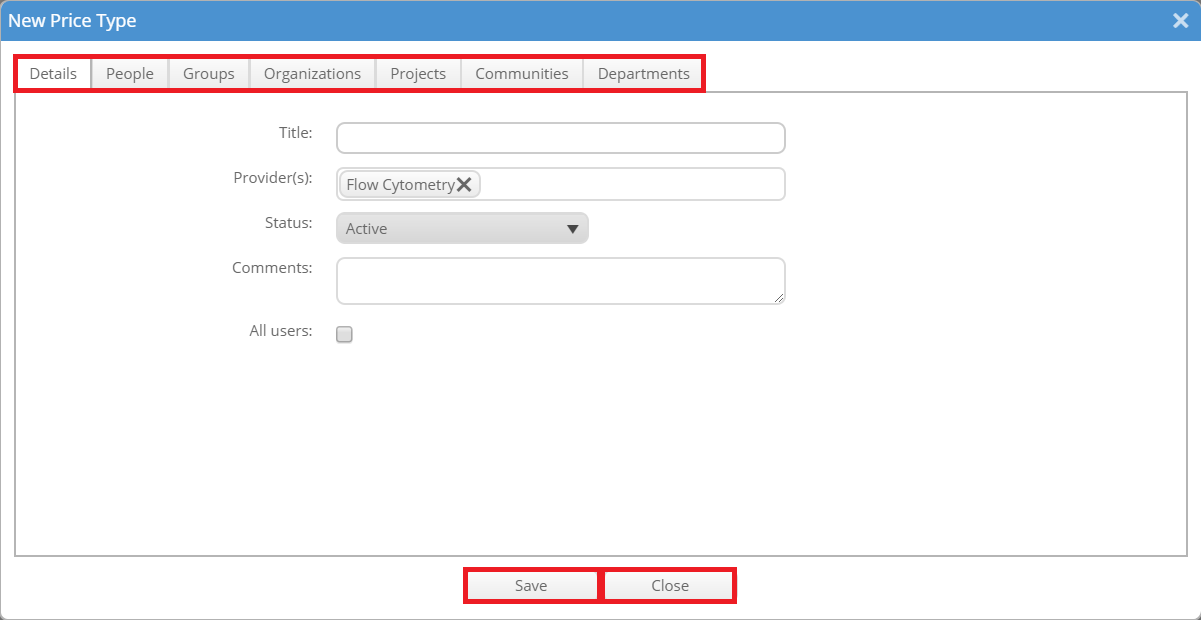
Topic: Price Type
This topic allows you to define new sets of users/groups/departments/organizations/communities to apply a price to. To create a new price type click on "New Price Type". A new window will open where some details need to be entered and a set of people can be chosen. These sets of users can be used when creating a multi usage fee. A price type can be duplicated by clicking on the symbol with the two sheets of paper and it can be edited by clicking on the gear wheel symbol.
Topic: Charges
This topic displays all charges with equipment or service usage. Charges can be filtered by date and grouped by various parameters including provider, group or user. It is possible to show only unassigned charged (tick: "Show only unassigned charges") or all of them (untick the field). Unassigned charges are charges, which are not assigned to any invoice yet. The charges can be sent to "Invoices" by selecting them and select the action "Add charge(s) to invoice". Other actions are: "Delete charge(s)", "Remove from invoice", "Mark charge(s) as waived", "Unmark charge(s) as waived", "Export to CSV", "Export to Excel" and "Recalculate charges".

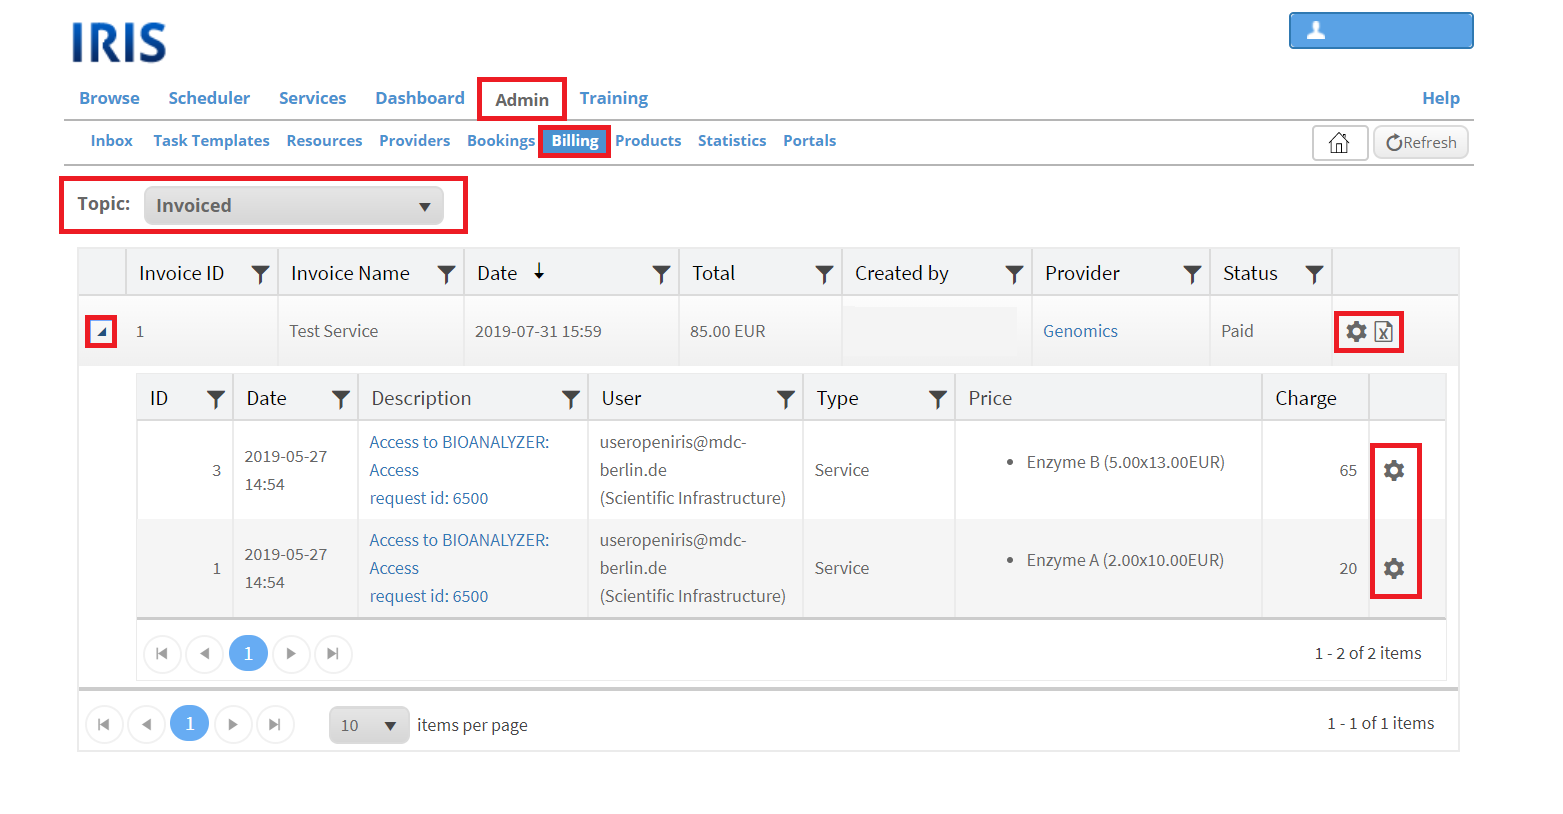
Topic: Invoiced
An invoice is a collection of charges. Charges can be selected and added to an invoice either in the Topic: Charges (as desribed earlier in this article) or by applying the same action on the charges of a specific service (found at ADMIN.INBOX.SERVICE DETAILS.CHARGES). When the action "Add charge(s) to invoice" is selected, a new window opens where the invoice is crreated. Therefore an ID and a name are needed. Additionally you need to select a status and can add some comments. After creating an invoice it will be found here at ADMIN.BILLING.INVOICED. An invoicce can be edited by clicking on the gear wheel symbol. Then the name, status and comments of the invoice can be edited. The sheet symbol with an x allows an export of this invoice to excel. By clicking on the little triangle symbol on the left of the invoice all seperate charges of the invoice can be seen and edited. Please note that not much changes of the charges can be done after it is added to an invoice. But while editing it can be removed from the invoice. The status of an invoice can be changed to "Draft", "Billed", "Paid" and "Waived".
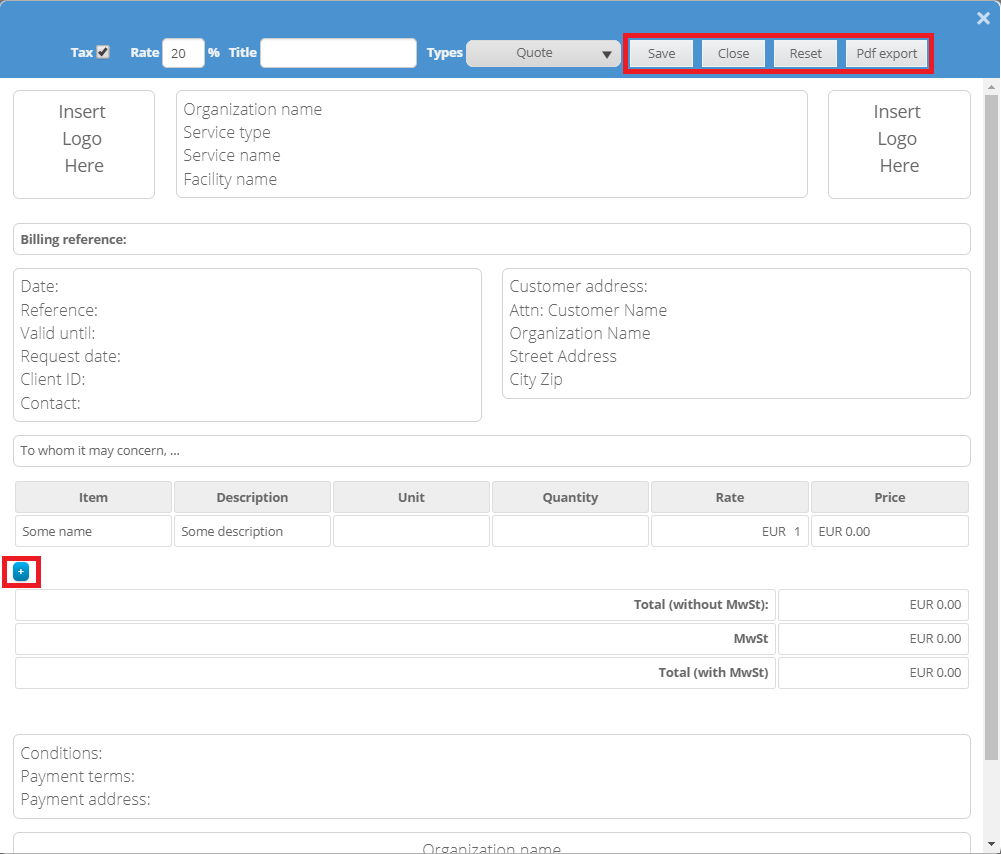
Topic: Quote Templates
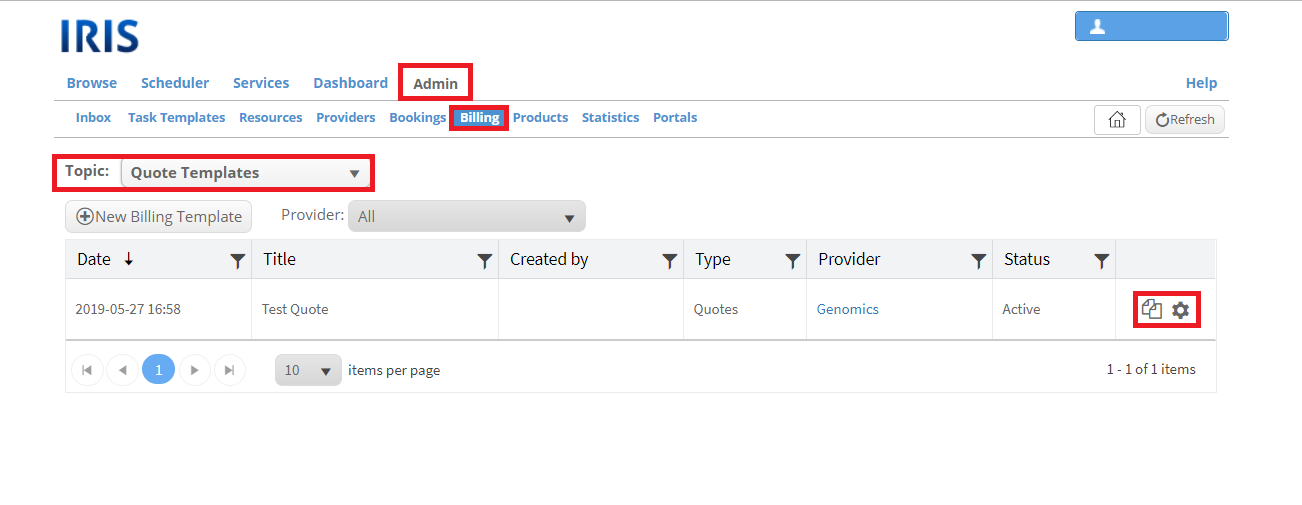
To create a quote you need a quote template for the provider.
New Billing template: select a provider first then click the button. New window will open
Topic: Quotes
What is a quote? Quotes can be made as an offer to clients. They can only be created from templates of the provider. These templates need to be created first (see "Topic: Quote Templates").
A new quote can be created by selecting a provider and then clicking on "New quote". Now a previously created quote template needs to be selected. All information filled out or left out in the form can now be changed but the template helps preventing to fill out information
New Quote: select provider, "new quote", select a quote template from the provider (needs to be made first, see topic: quote templates)
Same possibilities to change information but do not need to fill out some information over and over again (like institute, provider, etc)
Quotes can also be created for a service in the ADMIN.INBOX. Open the additional information with the little arrow symbol and open the tab "Products". There select all required products from the products listing and apply the action "Send to Quote". A new window will open where you have to select a quote template or create a new one. Then the selected products will be inserted into the template. After adjusting all other features of the quote you can save it and/or export it to PDF.