Upgrading or reseting a Cubbli installation
Upgrading or resetting a Cubbli installation
Cubbli upgrades and resets are managed by an upgrade-script which completely replaces the existing Linux system directories (/usr, /var/, /etc.) with a new installation from a premade installation image. This script can be run by ordinary users.
Please note:
- The usual method to update Ubuntu and Debian systems (do-release-upgrade) does not work and is likely to break the Linux system if used.
- If your system partition (root) size is ~80G (you can check from the terminal with: $ df -h), you should contact cubbli-upgrade@helsinki.fi and book a time to do a clean install instead of an upgrade.
Upgrading Cubbli will usually take less than two hours. The size of the current installation is about 30GB when compressed. This means that over a slower network the upgrade might take a long time.
1. If you want to install the upgrade yourself:
- The upgrade might fail and the computer might not boot. If this occurs, you must bring the computer to the university IT support for inspection. Should this occur, your files are most likely safe.
- Use a wired network connection. USB connected mobile phone works too.
- If the upgrade script refuses to run, please contact cubbli-upgrade@helsinki.fi.
- The upgrade script will ask for your sudo password, but will accept your university password even if you do not have sudo rights.
Please note the following about the upgrade installation:
- You need a working wired network connection to complete your first login to the computer after the upgrade.
- All wireless connections will be forgotten during the upgrade.
- Home directories and any files or folders under the /home/ directory will be saved.
- All mount points for RAID devices, external hard drives and network file shares (NFS and Cifs) will be kept as is.
- Active directory (AD) domain membership will be kept as is.
- SSH public and private keys will be saved.
- All system modifications made with admin rights will be lost.
- Any software installed in system directories will be gone. For this reason, you should install your research and development software under your /home directory instead of system directories.
- There are some exceptions to the aforementioned rule, since /opt is not completely cleared out during the installation. However, please do not rely on this.
- For some hosts (mostly Lenovo computers), the script will also install firmware updates.
- The script will check for certain software installations which might cause significant data loss if deleted. In these instances, the installation script will refuse to run. Such instances include e.g. docker images and virtual machines.
- The first Linux image download (about 10GB) cannot be restarted. The image download will start from the beginning if interrupted.
How to upgrade or reset the installation:
Please make sure to back up your data before beginning the installation/reset process!
- You do not need administrator (sudo) rights to run the installation script. Just write your university password.
- Start your preferred terminal application and run the command: cubbli-upgrade or select Upgrade Cubbli version from the University Menu.
- Follow the instructions.
- The computer will restart automatically after the first download has finished. You should log out of your session before that happens. The upgrade installation process and the download will continue in the background.
- After the upgrade has finished, follow the first login instructions.
2. If you want our IT support to install the upgrade for you:
Please make sure to back up your data before beginning the installation/reset process!
- Contact cubbli-upgrade@helsinki.fi and request the upgrade.
- Arrange a time slot for the installation with IT support.
- Bring your computer to the university premises.
- Connect the computer to the wired network.
- Connect the computer to a charger.
- Log out of the system before the agreed time slot. We will initiate and run the upgrade remotely for you.
- After the upgrade has completed, remember to login to the computer once while connected to the university network via wired connection to ensure that your user account will also be available outside the university network and offline.
Running the upgrade
The shortcut in the University Menu should be available for all Cubbli distributions. If you cannot see it in the menu, you can skip to the next step Installing the upgrade from a terminal window.
Starting the upgrade from the University Menu:
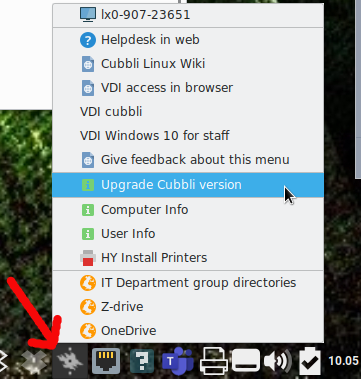
Starting the script from the UH-Menu

You are currently reading the instructions, so you can click Start Upgrade
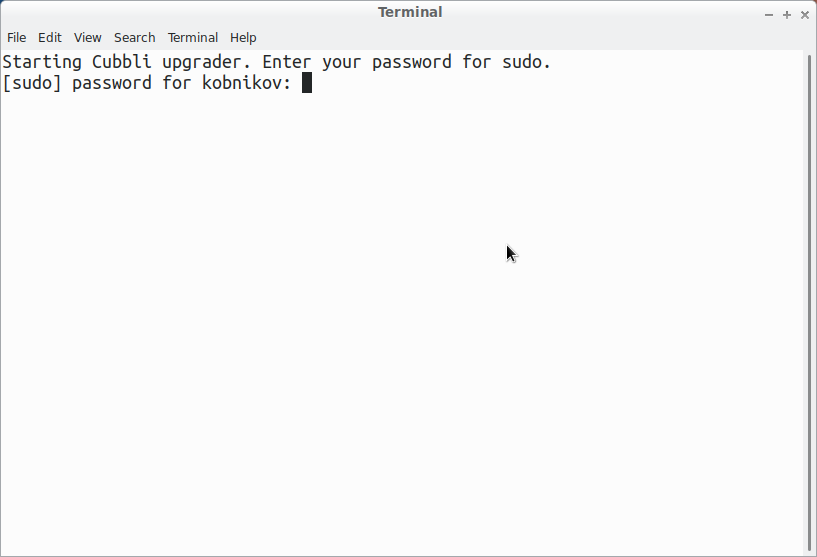
New terminal window opens (Just write your password if asked)
Starting the upgrade from the terminal:
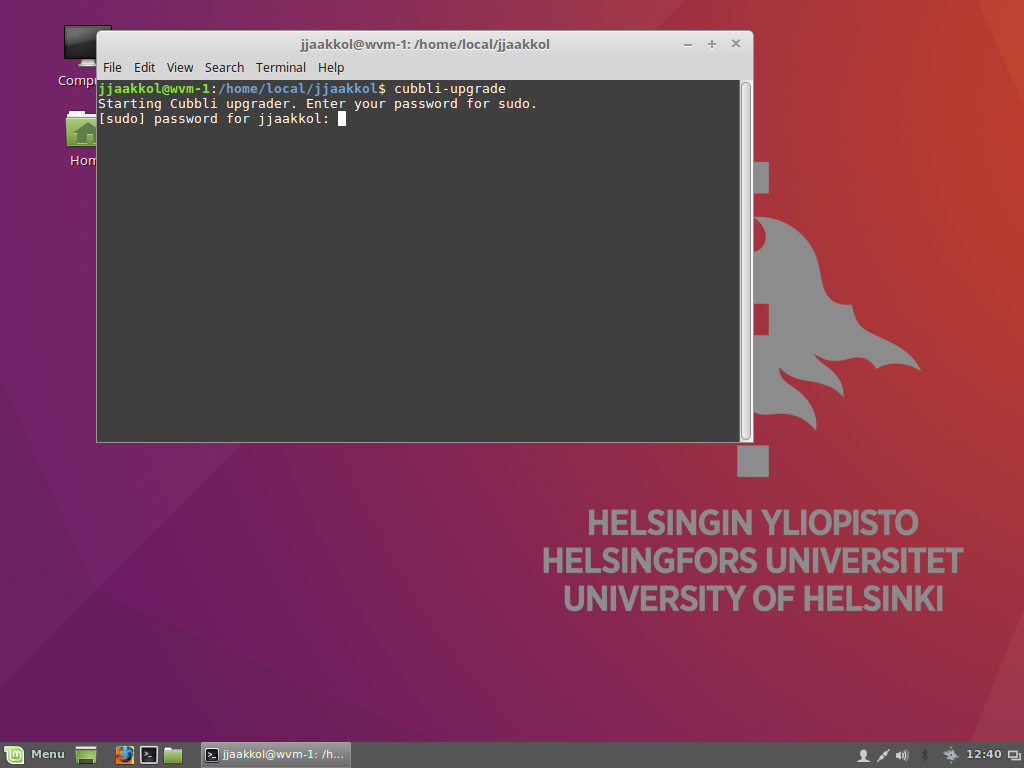
First the script asks for sudo password or just password.
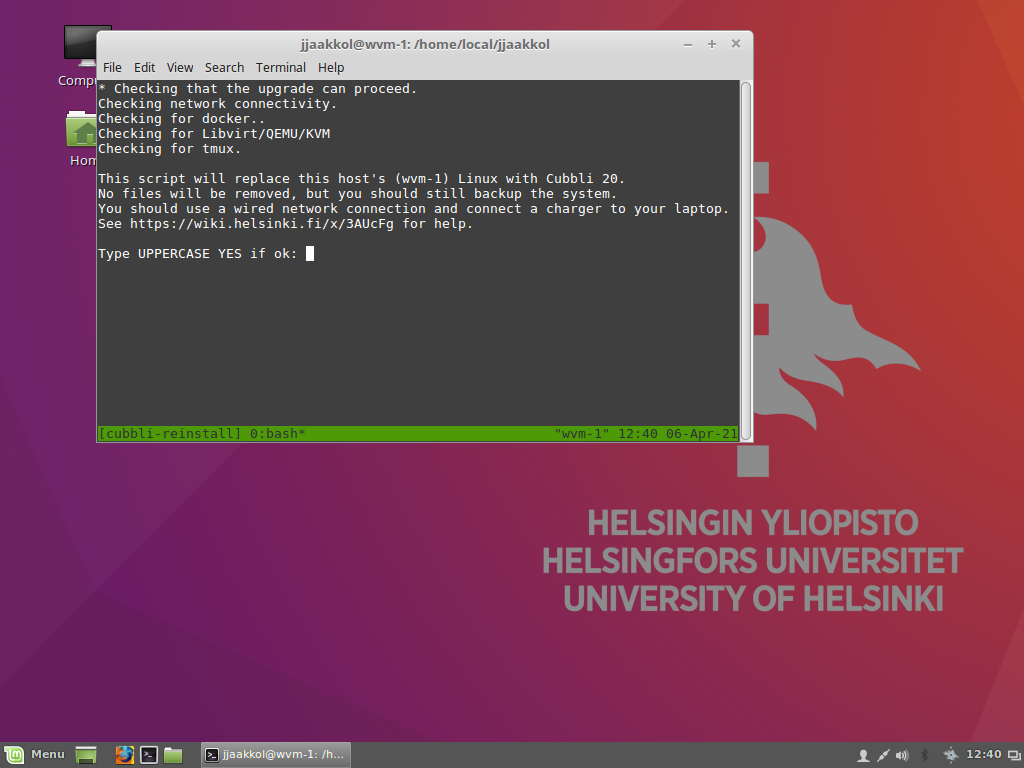
Confirm that you really want to upgrade.
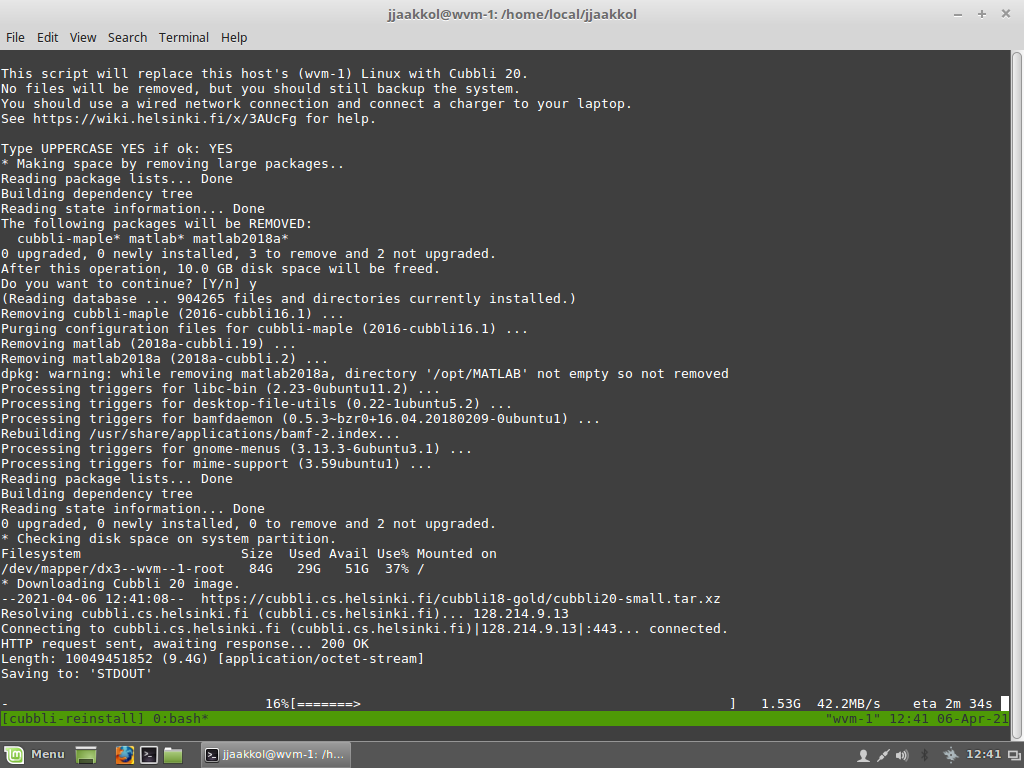
Wait for the upgrade to be downloaded.
After the download has finished the script will switch the Linux installation to the new system image and restart the computer. After the first restart, the previous operating system will be removed, and remaining software (about 20GB) will be downloaded and installed.
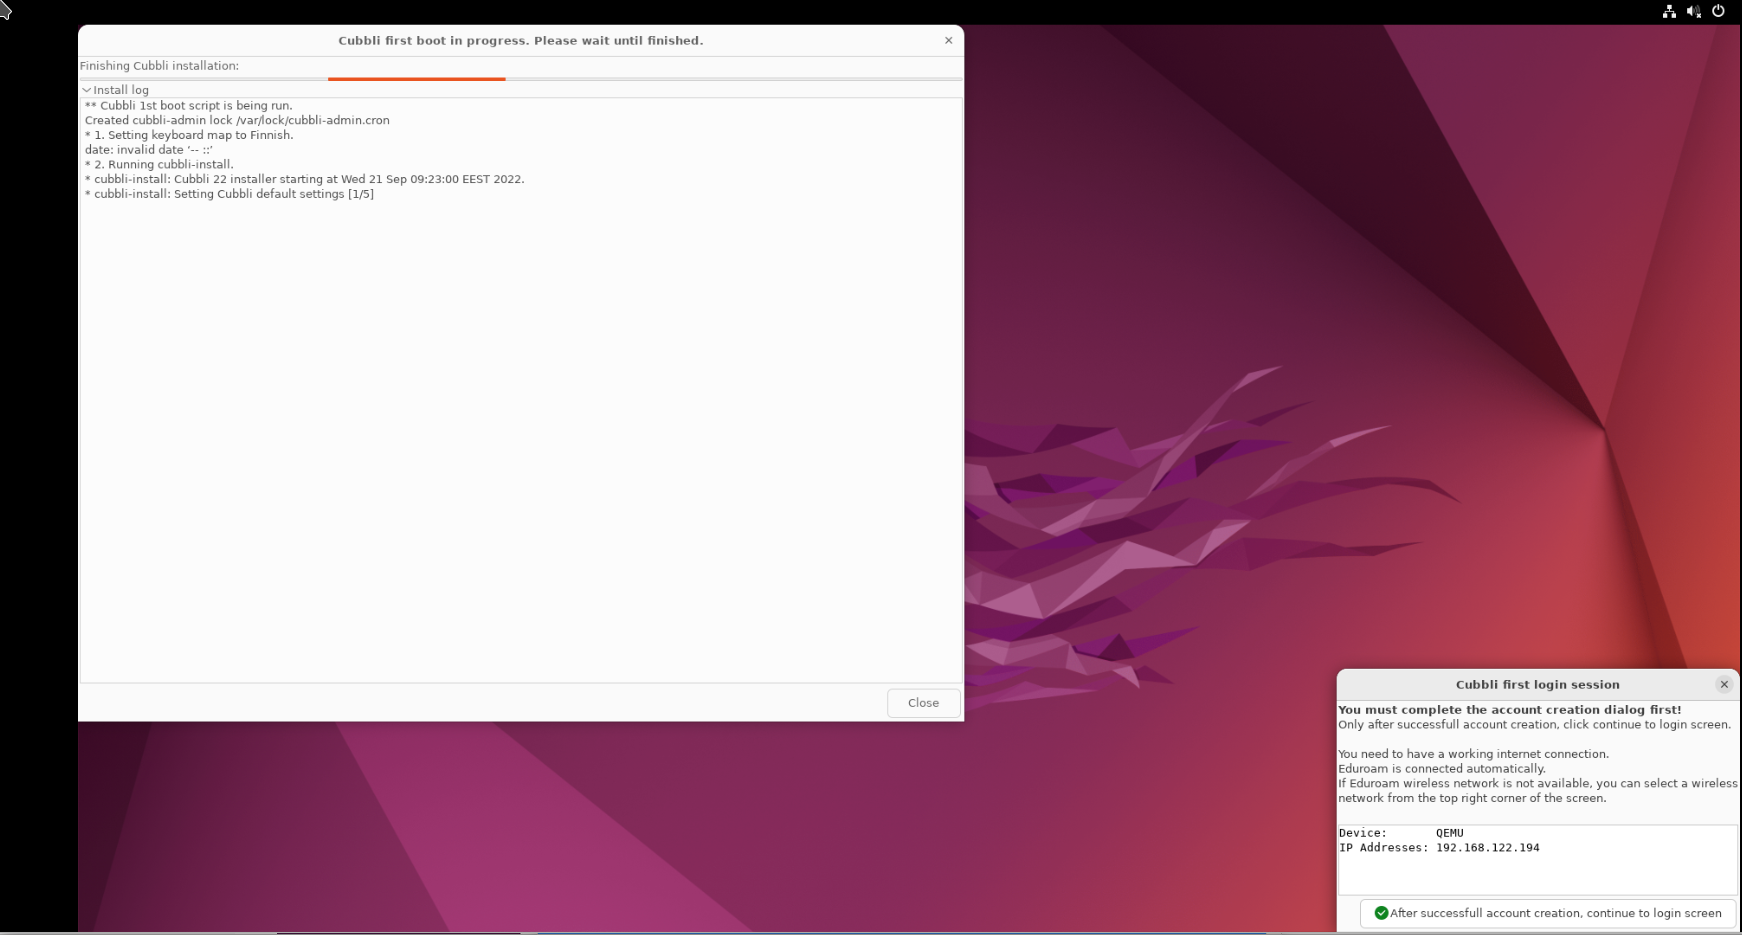
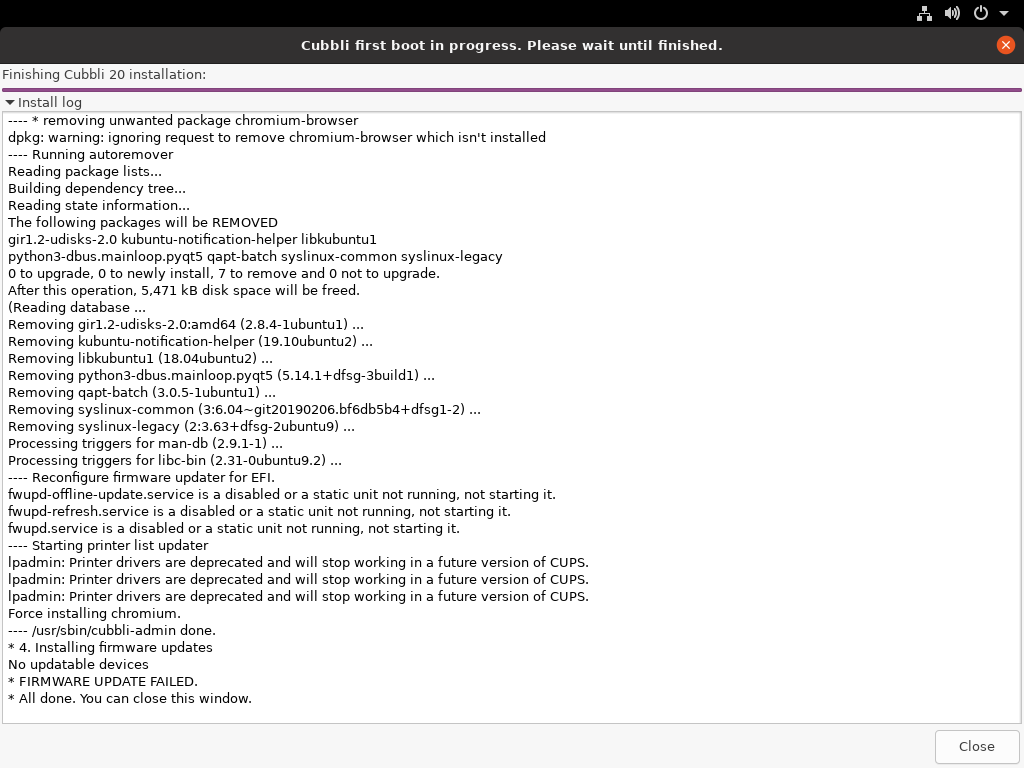
Wait for new system install to finish.
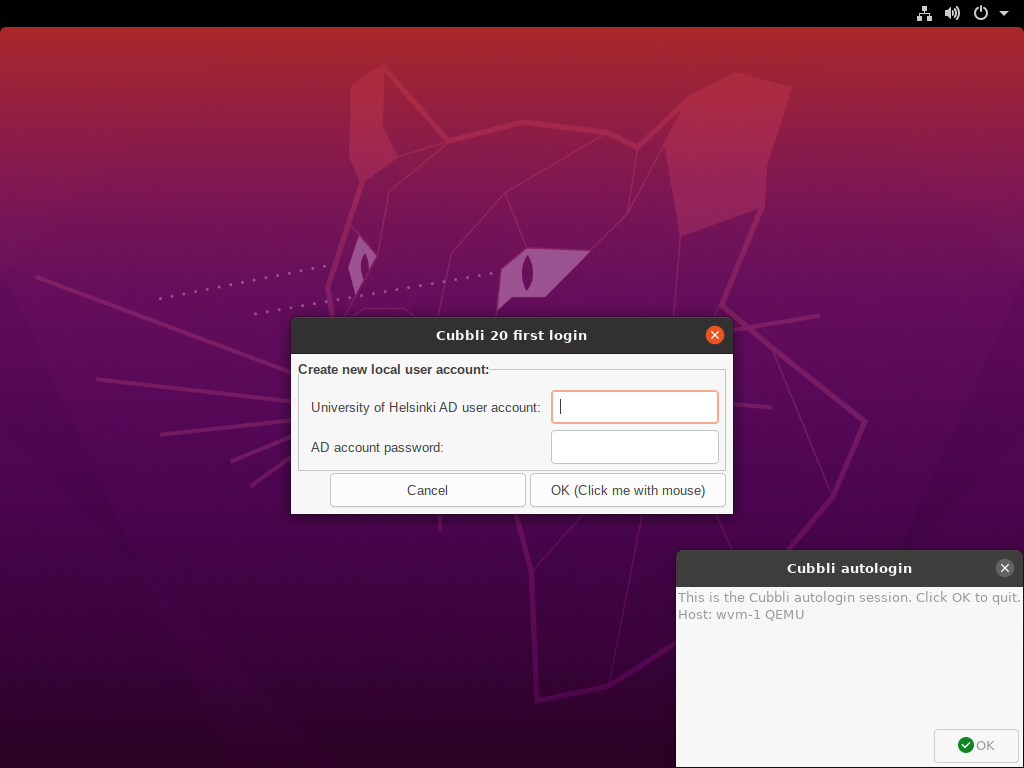
Login to your new system for the first time.
See instructions: First login to a Cubbli Linux host