Edit a service
This page describes the main features you can edit for a service. Most options are also described in the article about their function. All of these options can be found in the settings of a service. You can only edit a service when you are an admin of it.
How to open the settings of a service
Opening the settings of a service is very similar to opening the resource settings. To edit a service, you have to click on the gear wheel symbol in the toolbar of the service. This symbol is only visible to portal, provider and resource admins. Now a new window called "Edit Resource" opens with multiple tabs. Whenever you edit your service be sure to click “Update” to save the changes you made. By just clicking the “Close” button your changes will not be saved. The gear wheel symbol in the toolbar can be found in BROWSE.RESOURCES, SERVICES and ADMIN.RESOURCES.
Tab: Access
In this tab you can grant manual access to individual users or groups of users (whole groups, departments, organizations, projects or communities). More about the visibility and access to a service or resource in general can be found here. Information about the direct access via the "Access" tab can be found here.
Tab: Issues
This tab lists all reported issues for the service with the submitter, its currents status, etc. Here you can also create a new issue or edit an existing one. In order for users to report a issue, the issue button must be enabled. Read more on how to do so and how to deal with an issue in IRIS here. Read more on how users can report an issue once the button is enabled here.
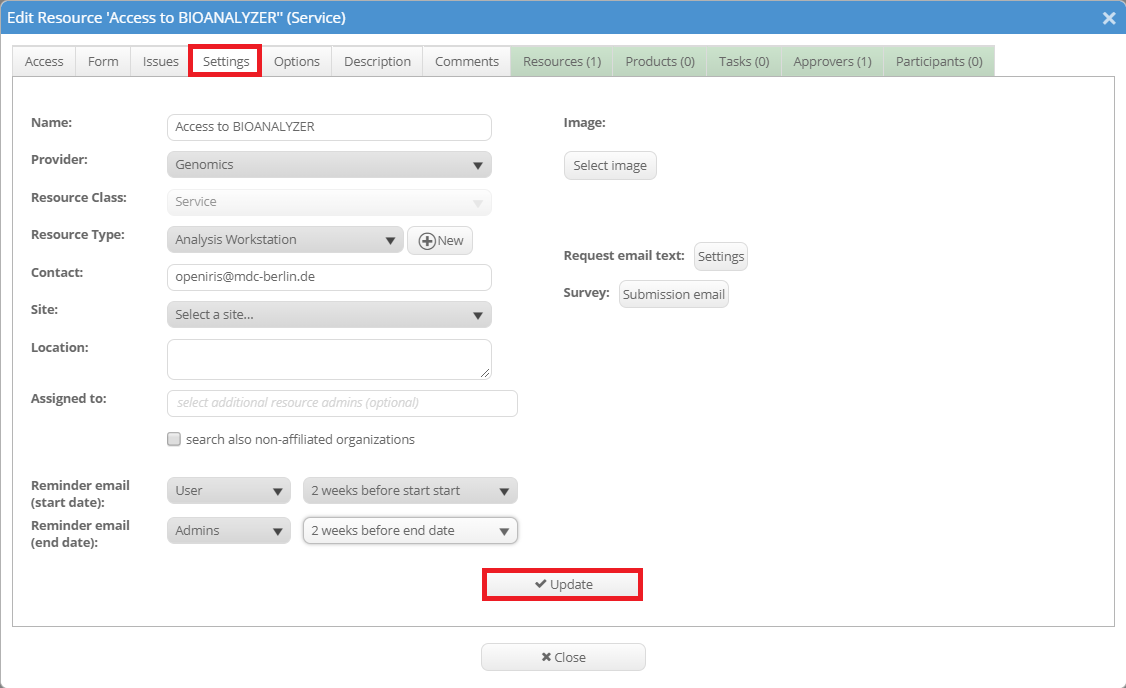
Tab: Settings
Here you can change the general information about the service. This includes its name, provider (only if you are the admin of multiple providers), resource type, contact email address, location, ect. Please note that the resource class cannot be changed. You can assign users to the service. Assigned users will be handled like resource admins and get informed about requests for this service. It is also possible to select whether automatic remainder emails should be send to the users for the start and end date of the request. For these mails multiple options about who should get them and when are available.
Tab: Options
This tab contains most settings for the service. Therefore, it can seem very overcrowded and is not simple to understand. The first part of the options regulates the visibility of the service. The second part regulates the display of specific buttons or alternative labels. In the third part specific requirements for sending a service request can be set. The fourth part contains options for the start and end date of the service, while the fifth part regulates the access to the service. Hoovering with the mouse over the question mark symbol will also give a short explanation for each option. Please remember to always click "Update" after changing the options. Otherwise the changes will not be saved.
Visibility
This part contains options to regulate the visibility of your service.

Visibility: This option regulates which users get to see your resource. Detailed information about all following choices can be found here. Keep in mind that if none of these options is chosen then every user with access to your provider will be able to see the resource.
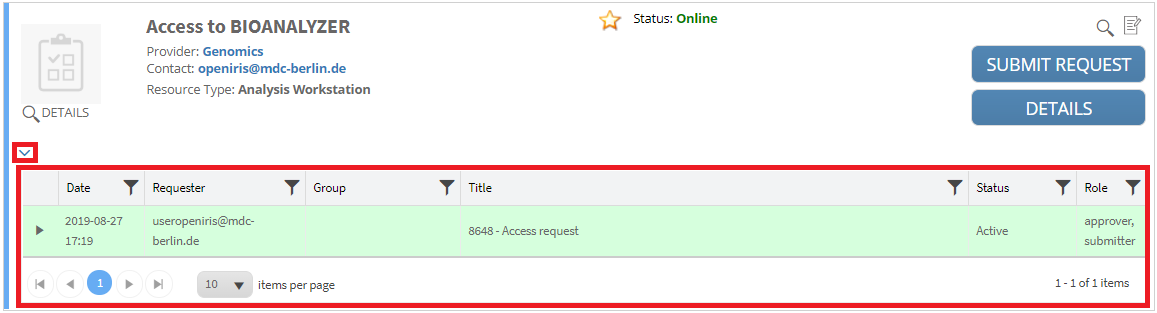
Enable: The shopping cart feature is only usable outside of the portal. To use it please contact the IRIS administrator. If the poll is enabled, current requests for a service will be openly displayed for the users at SERVICES. The poll can be shown or hidden as well as the details for each request.
Suppress: With this option you can disable notifications via email or in the user's inbox.
Display
In this part you can adjust the display of the request window for the service.
Alternate labels: The first part allows you to give alternate labels for "Title", "Comment" or "Attachment", which will be displayed instead of the default term for every user in the request window of the service.
Suppress: This option allows you to suppress specific parts of the request window. These parts will then not be displayed and therefore no information from the user can be gained.
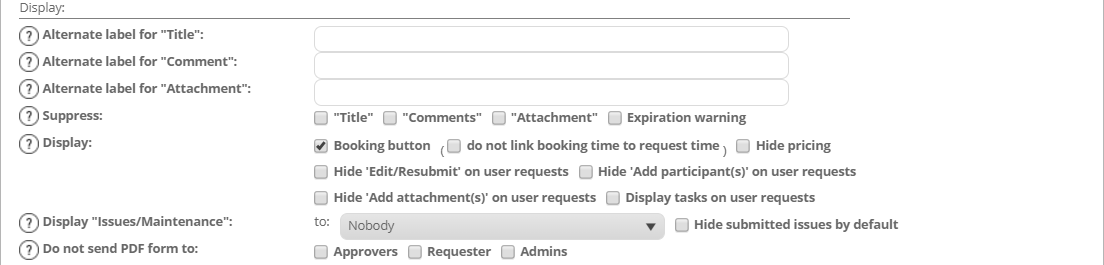
Display:
Display "Issues/Maintenance": In order to receive issue notifications for the service, you need to display the issue button. To do so you need to select the users who should be able to see the issue button in the drop-down menu. The possibilities are "Nobody", "Users who can book" and "Users who have access to my provider". It is also possible to tick "Hide submitted issues by default". This means that submitted issues will not be published automatically but flag them as hidden. Now the selected users can report issues of the service.
Do not send PDF form to: When a service request is send, the admins, automatic approvers and the requester will get an email from Open IRIS with details of the request and a PDF file with the filled out form. This option allows you to exclude approvers, requesters and/or admins from getting the PDF form via email.
Requirements
The options in this part regulates which information and other prerequisites are required by the users in order for them to request the service.

Requirements: With this options you make it required to fill out specific fields of the request.
Cost center: "Enable cost center" allows requests on a cost center if they exist and N/A can be a choice. "Requires cost center" requires a cost center on all requests and must be defined for all users or groups. N/A is not an available option anymore.
Projects: "On" allows requests on a project if they exist and N/A can be a choice. "On and required" requires a project on all requests and must be defined for all users or groups. N/A is not an available option anymore.
Start and End date
In this part of the options you can regulate the start and end date of the requests.

Display: This option allows you to limit the duration of a request by setting a start and an end date. When ticking "Start/ end date" the user can select a start and an end date for the request. When "Show time on start/end date" is ticked, it is additionally possible to select a time. This option will only work if "Start/end date" is also ticked. When "Start/end date not required" is selected, then the user is not required to give a start and/or end date. Keep in mind, that the start date is mostly filled out automatically with today's date. If a default duration is given, then the end date will also be given automatically as the date after completing the default duration.
Default duration: This option allows you to set a default duration in days, weeks or month for the request but only if "Start/end date" is selected above. Now the start and end date will be filled out automatically with today's date as the start date and the date after completing the default duration as the end date. Users might change the dates but is is not possible to select a longer duration than the default duration. If ticking "display start/end date as read-only" the automatic start and end date will be shown, but users can not change it. It is also possible to choose when a request should be closed after the end date is reached. A request can always be renewed. If this has not happened until the selected date after the end date, the request will be closed automatically.
Access
This part of the options regulates the access to your service and for requesting it.

Offline: This option disables the service for normal users but admins can still use it normally.
Enable: Request based request: This option only gives access to services via a request. By default no one has access to your service. But a corresponding service can be requested for access to this service. Only if the request to the corresponding service is accepted, users will be able to request this service. Read more about request based requesting here. Access request by users: This enables users which do not have access to this resource to send you a request to access you resource. Read more about access requests here.
Disable: With this option the access to the service via a service request can be disabled. More information about a service request can be found here.
Tab: Description
In this tab you can give a description of your service. This can be either a URL (e.g. a link to your providers own webpage) or directly entered text. The text entered here will then be displayed in the "Description" tab of the details window of the service. The details window of a service can be opened by clicking on the magnifying glass symbol in the toolbar of the service.
Tab: Comments
In this tab you can enter comments for this service. Comments are also displayed in the "Description" tab of the details window of the service just above the description. There is also the possibility to show the comments in the resource booking window. To do so click the respective button.
Tab: Resources
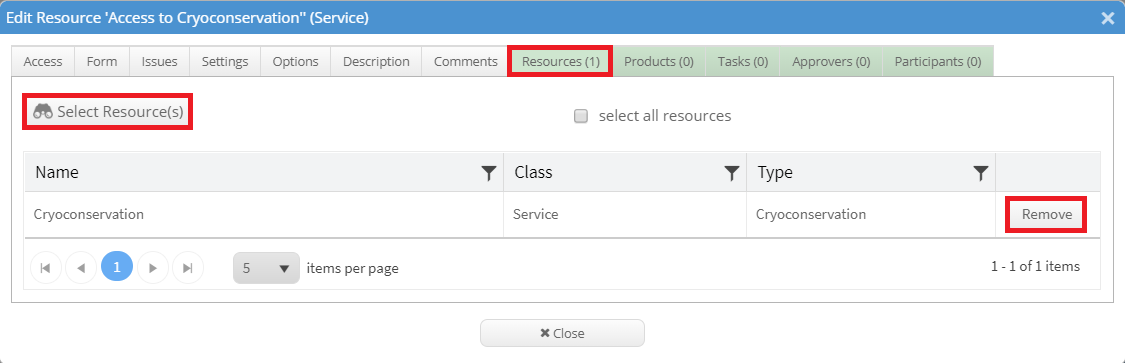
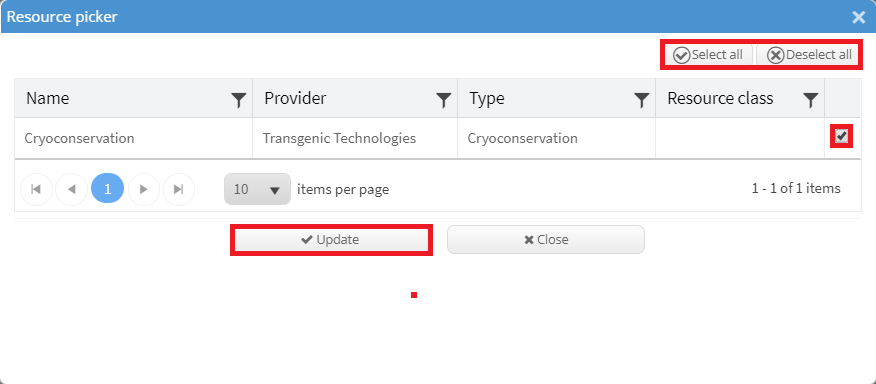
In this tab you can add other resources to the service for request based booking (scheduled resource) or request based requesting (service). To add resources to the service click on "Select Resource(s)". Then a new window with a resource picker containing all possible resources of the provider opens. There you have the option to select or deselect all listed resources or to select them individually. Do not forget to click "Update" after you are finished with the selection to save the changes. As an alternative you can also tick "select all resources" in the resource tab and all possible resources are added to the service. Click "Remove" to remove a resource from the service or untick them in the resource picker.
Tab: Products
In this tab all products from your provider (created and listed at ADMIN.PRODUCTS) can be listed for the service. To add a product you can select it with the left drop-down and clicking on "Add product". Now it will be listed in the grid below. The products can be edited (pen symbol) or deleted from this list (x symbol). The number in brackets in the name of the tab indicates the number of products attached to the service.
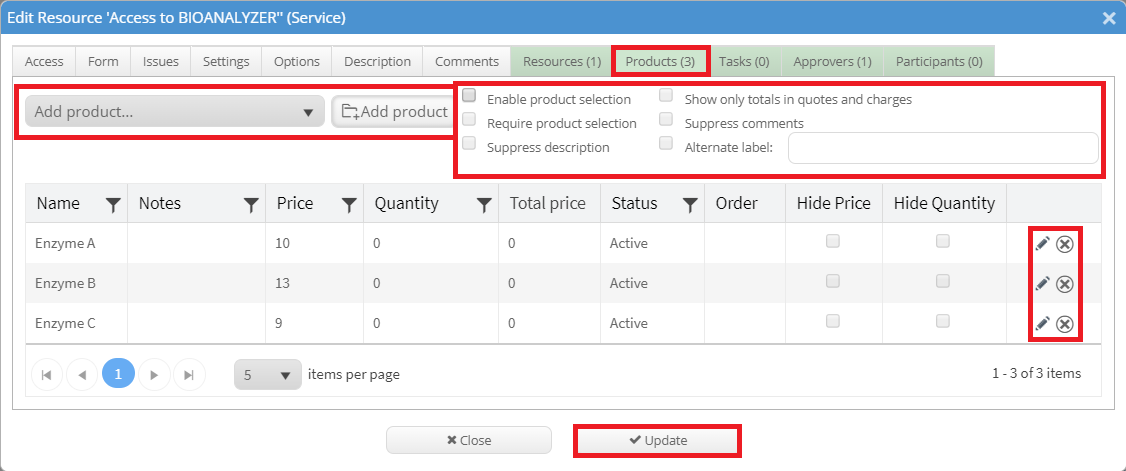
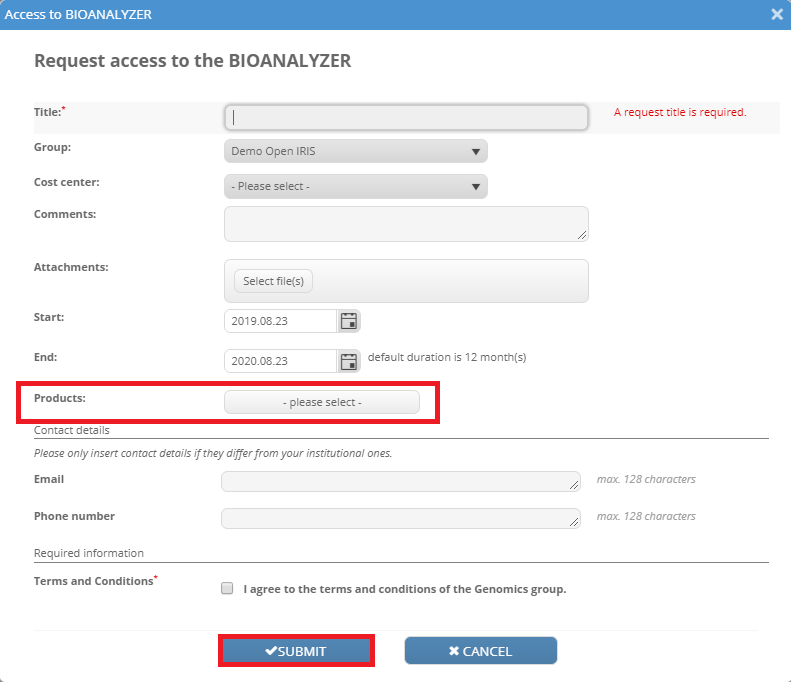
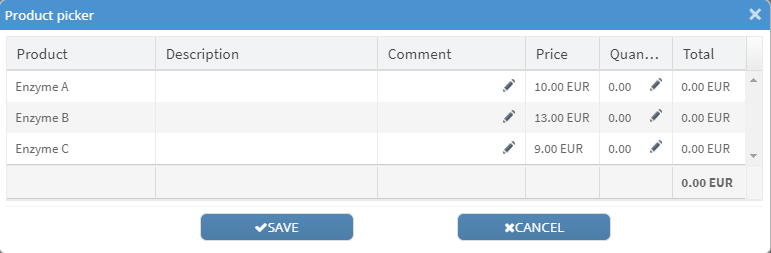
The list of products created in the products tab of the service settings can now be enabled for product selection when users request the service. This can be done by ticking "Enable product selection". Now the product picker is listed in the request. The product selection can be enforced (tick "Require product selection"). Then at least one product must be selected in order for the user to request the service. Other possible selections are: "Suppress description" (The row Description will not be displayed in the product picker.), "Show only totals in quotes and charges" (The rows Price and Total will not be displayed in the product picker but the total charges will be displayed on the request after the product selection.), "Suppress comments" (The row Comments will not be displayed in the product picker.) and "Alternate label" (The entered text replaces the label "Products:" on the service request.).
Tab: Tasks
In this tab task templates of the provider can be added to the service. Task templates which are added to a service in this way will automatically always be listed as tasks of every request of this service. The tasks of a service can be found at ADMIN.INBOX if you open the details window of a service and then select the sub-tab "Tasks". There additional tasks can be added and existing ones can be edited or deleted. Here you can read more about tasks.
Tab: Approvers
Approvers can be used for a service. If approvers are set, they also get the service request and need to approve of it. Only if all approvers have approved the status of the request changes from pending to active. Approvers can be set for each request individually (read more about this here) or they can be set generally for the service. The latter one can be done in this tab.
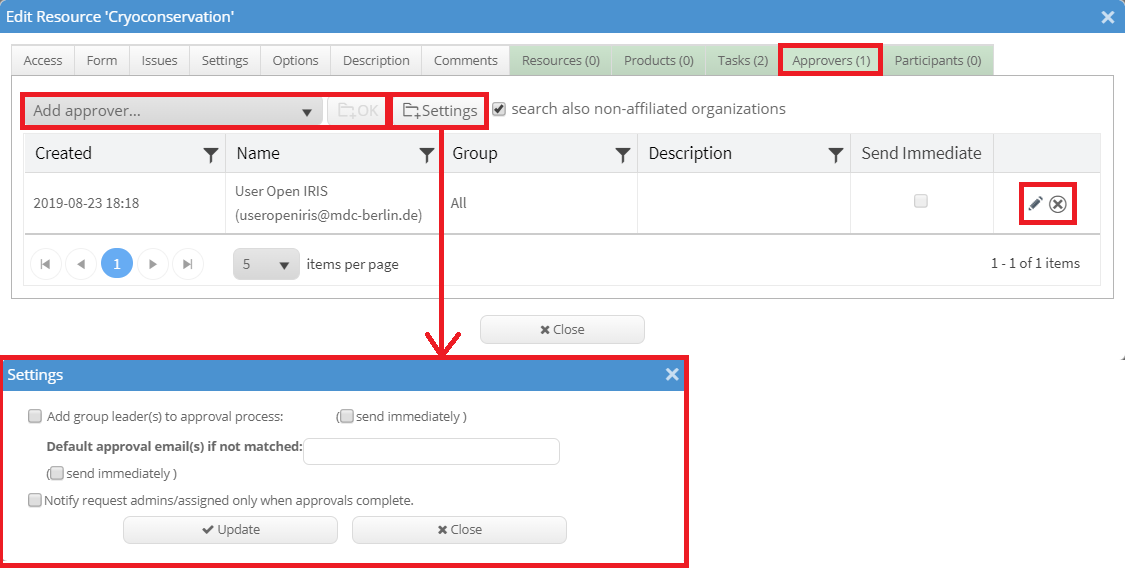
Approvers are used for a service. They also get the service request and need to approve it in order for the status of the request to change from pending to active. In this tab general approvers for every request through this service can be set. It can also be set for which groups the approver should be (all or just selected). If just selected then the approver only needs to approve if the service request comes from a member of the group. The description is like a comment just for your information and will not be displayed somewhere else. "Send immediate": if that field is selected the approver will automatically get the request send via email and needs to approve. If it is not ticked then you need to push the button "send" in details window of request in ADMIN.INBOX (tab "Approver") in order for it to be send. Can be edited or deleted. Can have multiple approvers.
"Settings": can set that the group leader of the requester always needs to approve (select "Add group leader(s) to approval process"), can also be done automatically (click "send immediately"). Also option to send the request to an default approval email (also possible to do immediately). And possible to set that users which are assigned to the request and request admins only get informed about the request if the request is approved by all approvers (click "Notify request admins/assigned only when approvals complete").
Tab: Participants
Delete a service
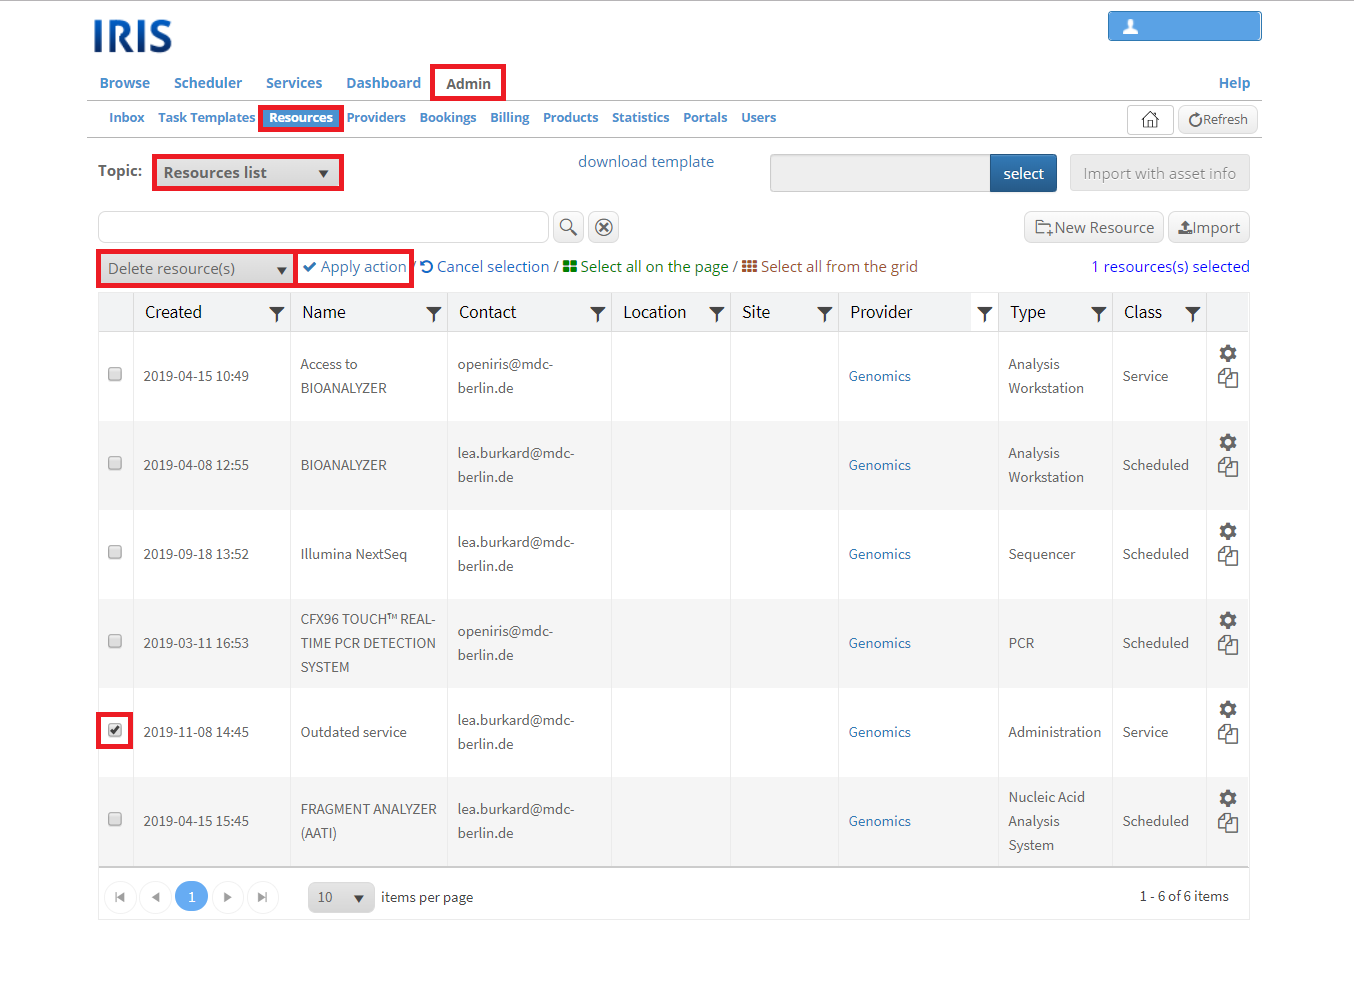
To delete a service go to ADMIN.RESOURCES and select the service(s) which should be deleted. Then select the action "Delete resource(s)" in the dropdown menu above the grid.
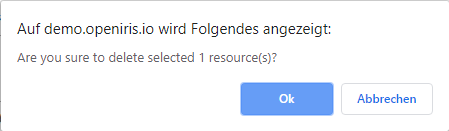
After clicking on "Apply action" a warning will be displayed and after clicking on "OK" another warning will be displayed.
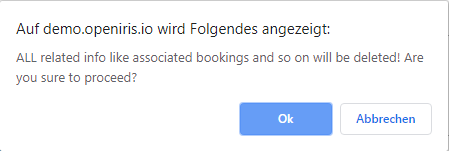
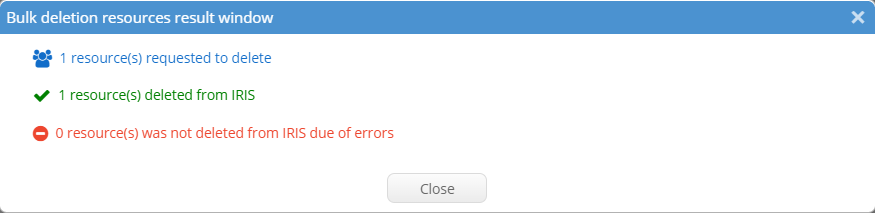
When both warnings are answered with "Ok", the service will be deleted and the following bulk deletion resource result window will be displayed to confirm the deletion. Please check here if the services are really deleted or if there were any errors occuring.