Jupyter Hub User Guide - OBSOLETE
This page is obsolete.
Current documentation has been migrated to Git:
https://version.helsinki.fi/it-for-science/hpc/-/wikis/6.0-Graphical-User-Interface
1.0 Introduction
In short, the Jupyter Notebook is a server-client application for editing and running notebook documents through a web browser. JupiterHub is a multi-user server which spawns and manages multiple single user notebook instances.
In practice this means that JupyterHub acts as a portal for multiple concurrent users, providing access to the shared resources. For example GPU's of the HPC environment, allowing the user to use Jupyter Notebook through web browser.
2.0 Access
You can access JupyterHub through web interface at hub.cs.helsinki.fi, available from VDI machines. To use the resources through JupyterHub, you still need access to the cluster resources. Eg. need to either:
be member of CS staff orhave your (research or course) IDM group as member of grp-cs-ukko2 IDM group
You have to log into turso.cs.helsinki.fi at least once for the automation to create an environment and to establish your directories. After this, no further logins to turso are required if you only wish to use Hub.
Please note that it might take up to 2 hours after you have been added to either group before your home directory gets created. If you do not have access, but would like to have one, please request the manager/owner of your IDM group to send note to helpdesk(at)helsinki.fi, specifying which group needs to have access to the clusters. Please note that keeping the IDM groups up to date is the responsibility of the group owners.
https://hub.cs.helsinki.fi/
3.0 environments
You may have used Python virtual environments in the past on the interactive sessions, and same guidelines are followed here, with some minor tweaks.
3.1 GPU Resources
JupyterHub offers regular CPU environments but also GPU's. GPU resources are allocated from shared GPU pool of Turso, and hence jobs are put to gpu 3 of gpu-oversub partition on Ukko.
3.2 Ready environments
Readily installed environments include for example Matlab and R.
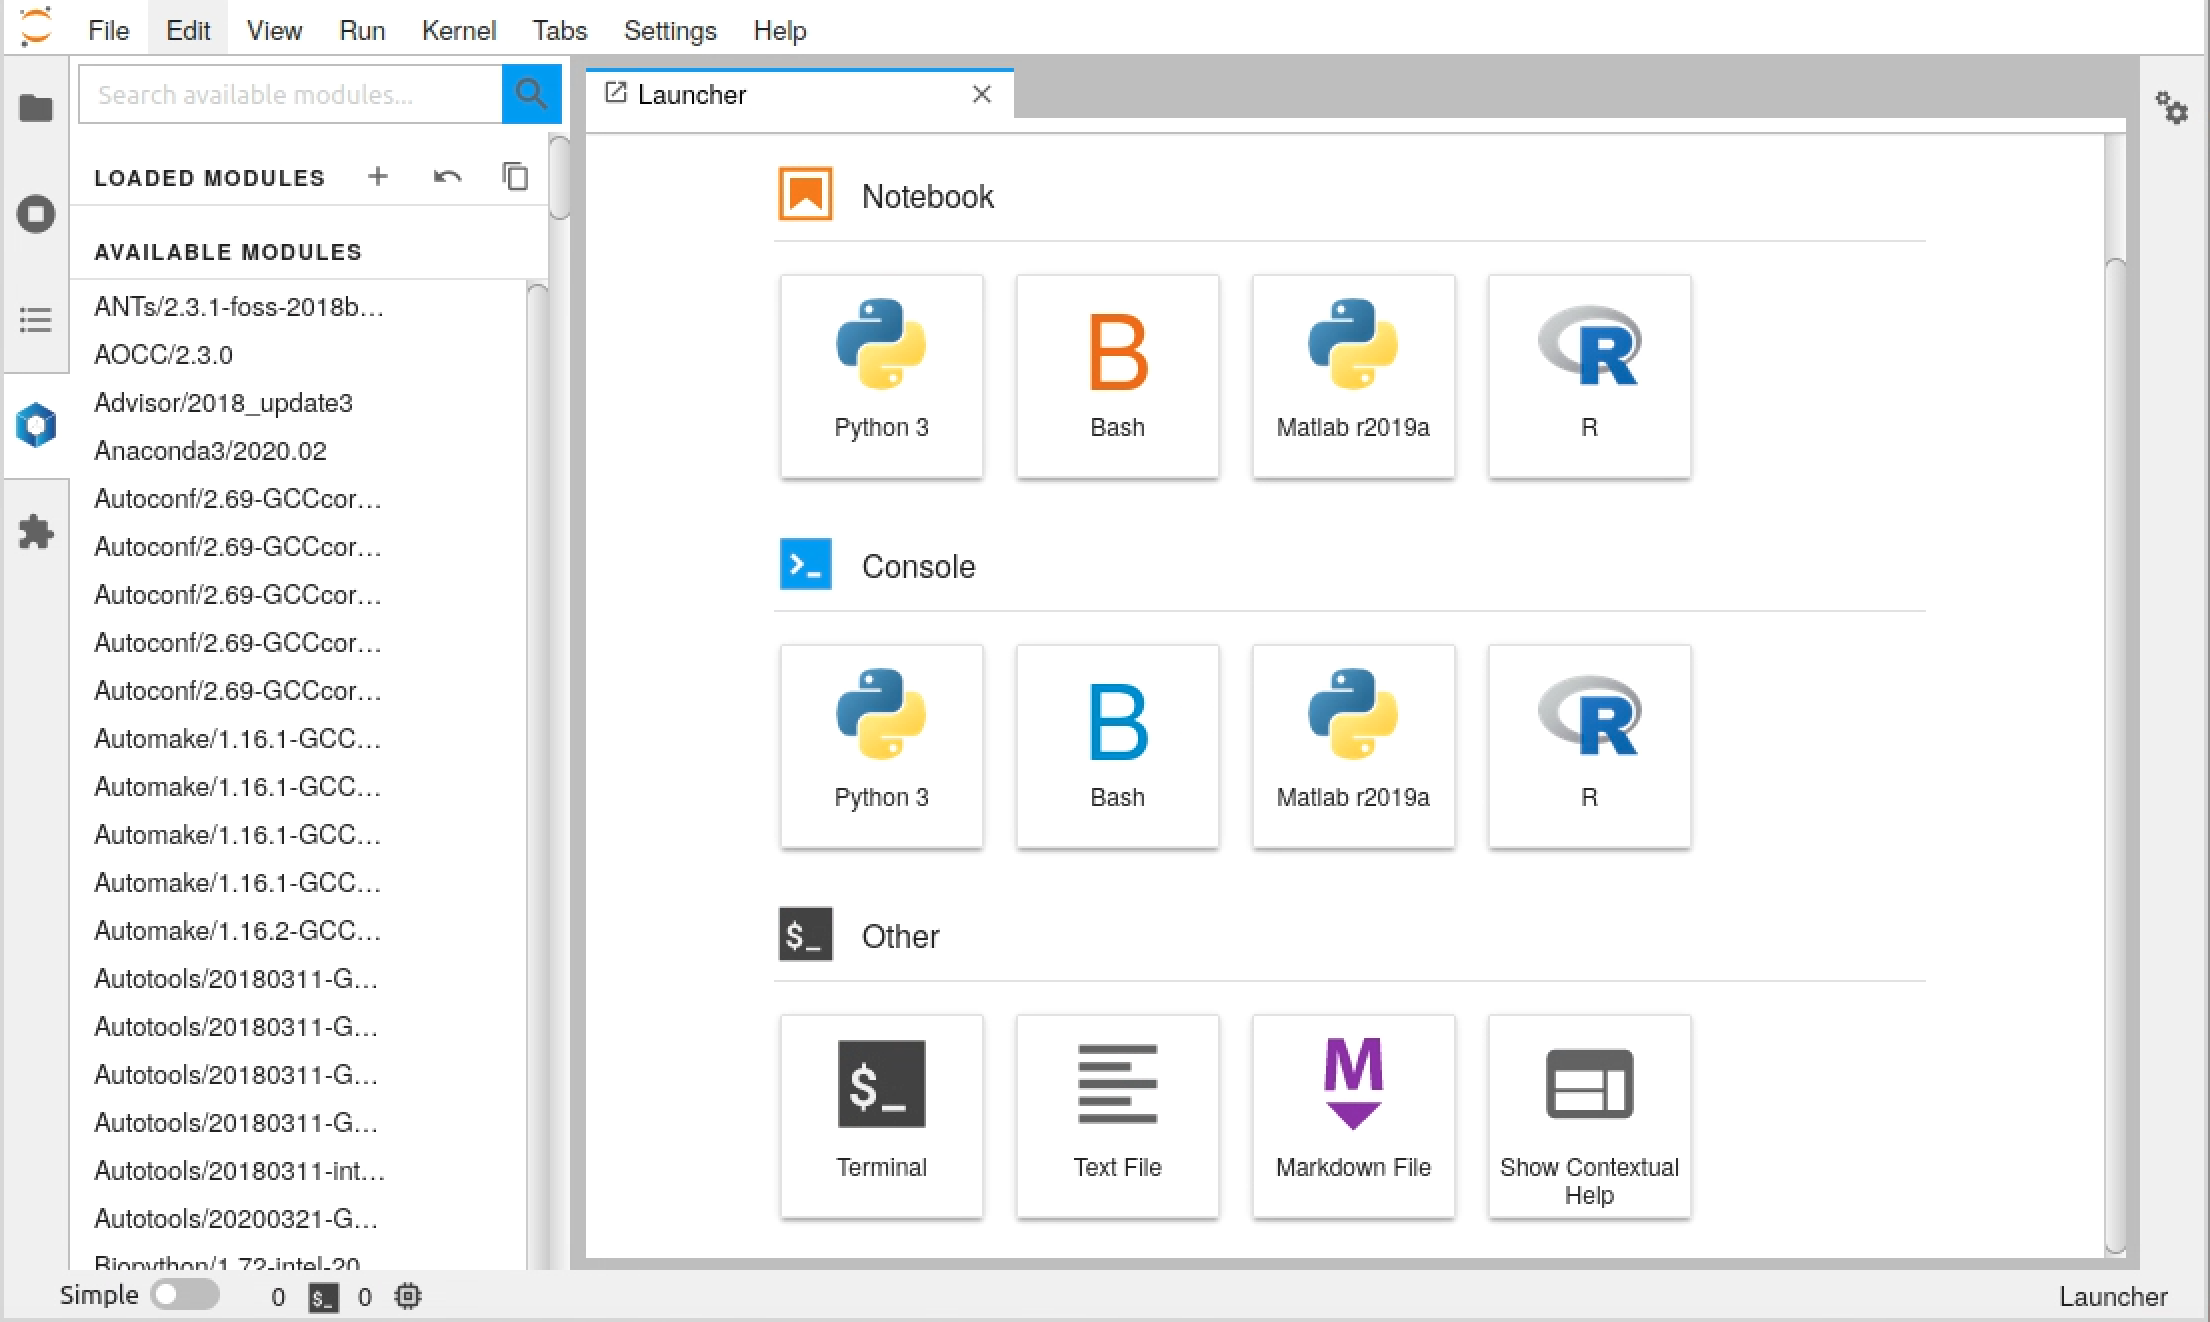
3.2 Working with modules and JypyterHub
If you are working with module based software, wether it is compilers or libraries, you will need to use the inbuilt module management system of JupyterHub. Loading modules from the terminal will not inherit modules to the rest of the environment. For example the virtual environments below will require you to load proper Python modules before you create the environments and/or activate them.
JupyterHub has hexagonal icon on the left side, under which you will find the same module list as with the compute nodes. If you wish to load modules for the environment, you just pick the set you need from the list (moving cursor to the module name, highlights the module, and little "load" button appers. Your currently loaded modules will show at the top of the list.
You can save the module sets from "+"button, and use restore button to recall the sets that you have saved.
3.3 SetUp your own Python virtual environment
You may of course use already created Python virtual environment, or create a new one from the scratch. First open Terminal session:
Click File → New and choose Terminal from pull down menuCreate a new virtual environment or use a existing onenew virtual environment cheat sheet (TODO)
Activate your environment (here we call it by name myenv)
source myenv/bin/activate
With this environment activated, you can install any package you want using “pip install PACKAGENAME“, or if a particular version is needed “pip install PACKAGENAME=versionnumber”
3.4 Add your own environment to Jupyterhub
To make your newly created, or old Python virtualenv appear in Jupyterhub, type in the terminal window the following command:
python -m ipykernel install --user --name myenv --display-name “Python (myenv)”
When start a Jupyter session next time, you can open the session in your new environment and use/install/remove/manage any package you wantwithout extra privileges!You can find good resources online.
4.0 Resources
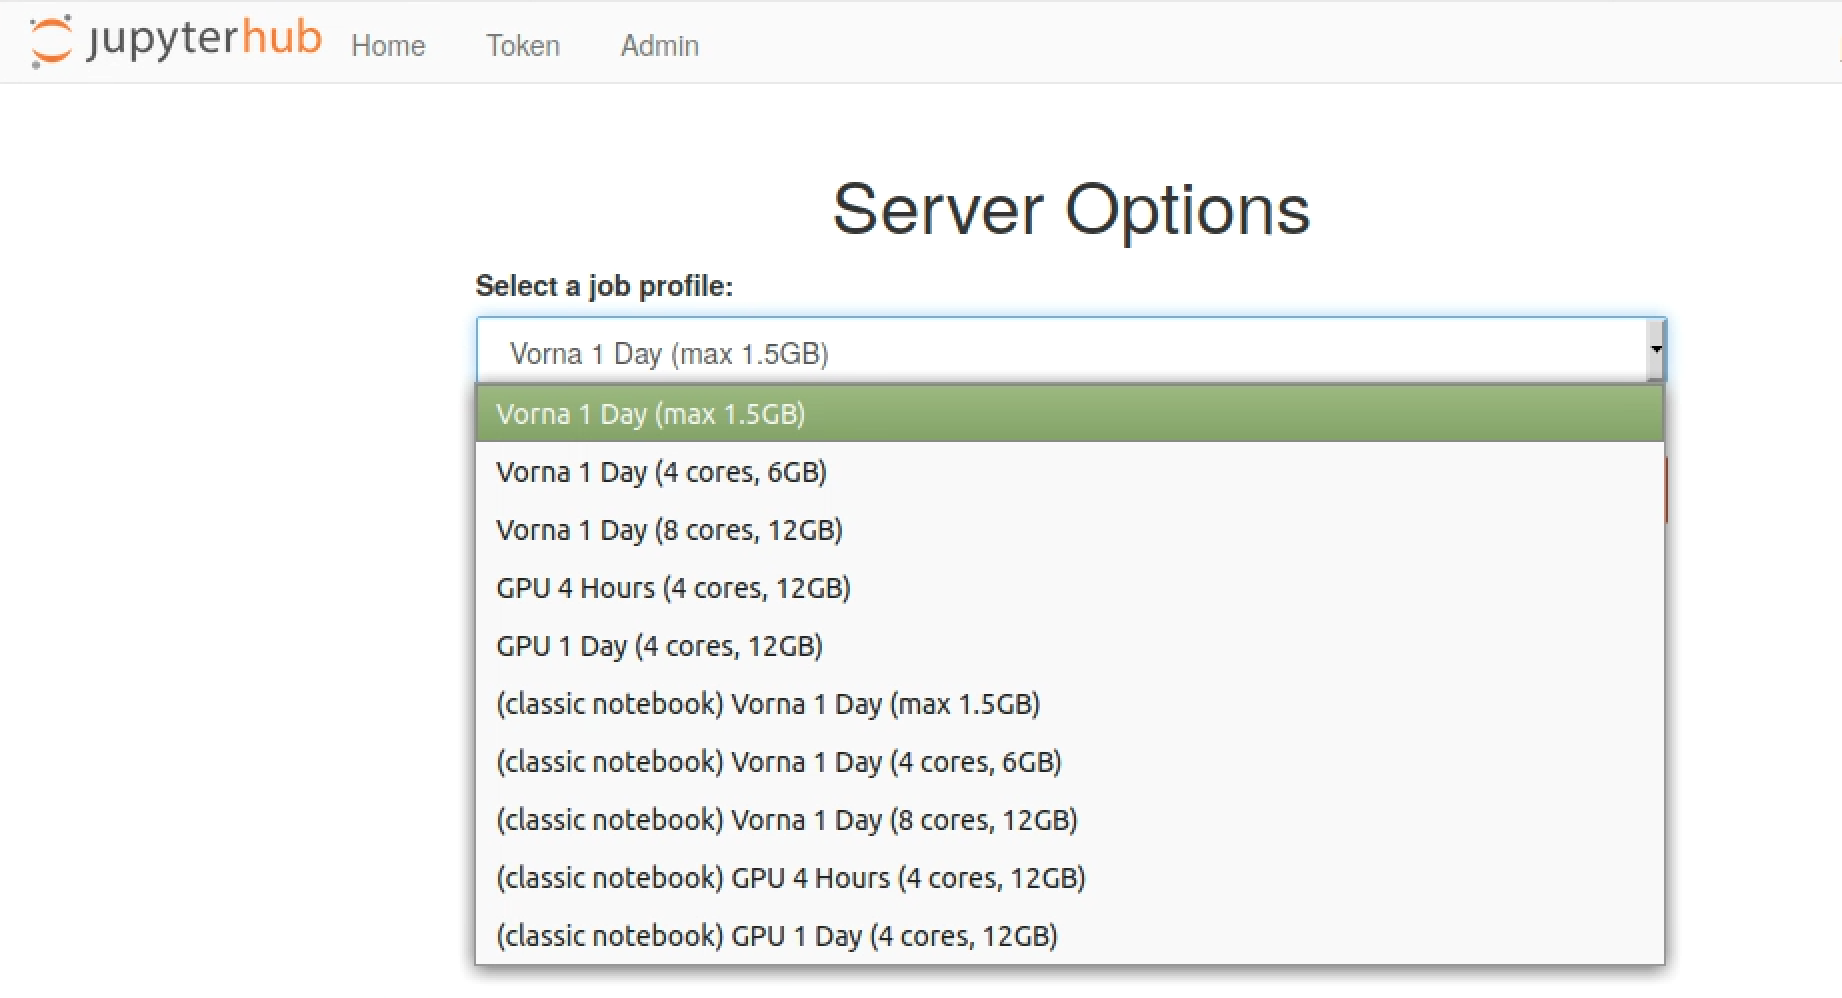
You can select different sessions from the JupyterHub startup screen, see an example below. This includes variations on the core counts, memory and length of the intended session. Users are able to choose both CPU and GPU resources.
4.1 Current session limits
Currently users are limited to interactive sessions with maximum of one day. Should you run longer jobs, we advice you to submit a batch job instead of running multi-day interactive sessions.
|
|
|
|
|---|---|---|---|
|
|
|
|
|
|
|
|
|
|
|
|
|
|
|
|
|
|
|
|
We do reserve right to make changes on the resource availability over time.