Public view
General information
As an admin you can generate web view or iCal feeds. These give users information about current bookings for selected resources on a display or in a calendar.
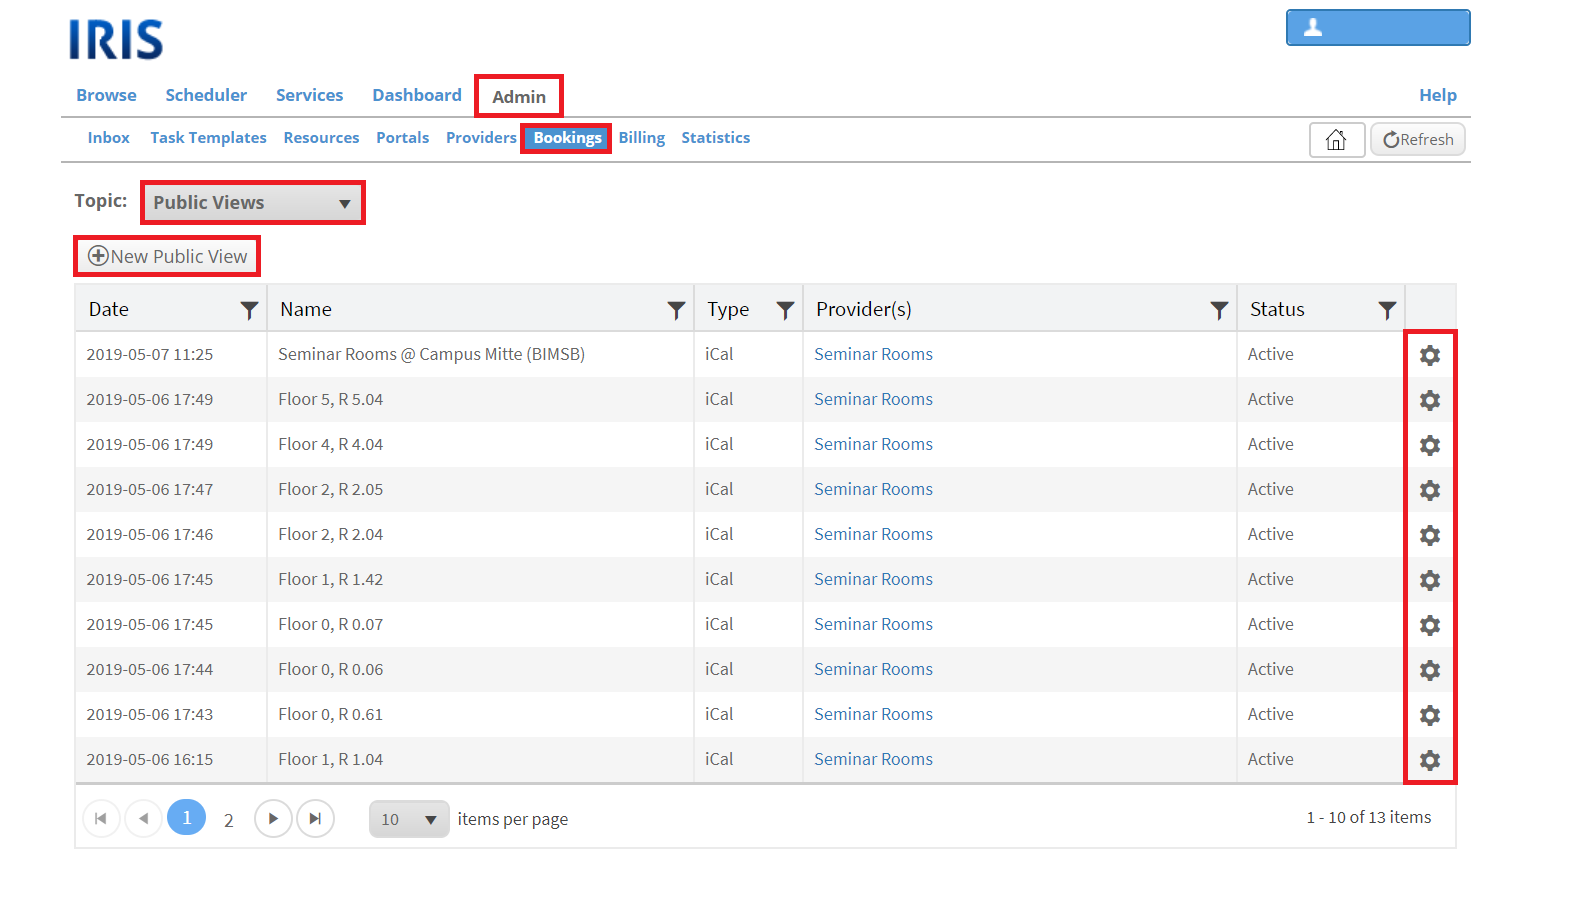
At ADMIN.BOOKINGS you can choose the topic "Public views". Now all current public views that either you created or are an admin of are shown. A new public view can be made by clicking on "New Public View". You can edit an existing public view by clicking on the gear wheel on the right side of it.
After clicking on "New Public View" a new window will open where you have to choose a provider (only the providers you are an admin of are possible choices) and whether you want to create a new iCal feed or web view.
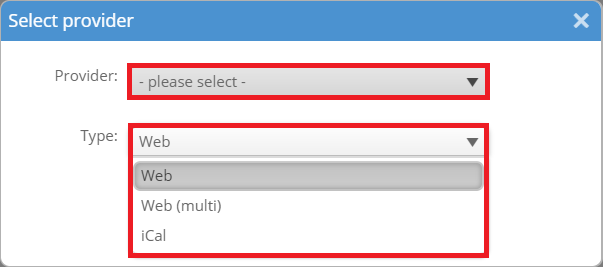
Selecting the type "Web" will generate a web view and selecting "iCal" will generate an iCal feed. More information on these two types and how to create them in detail can be found below.
Web
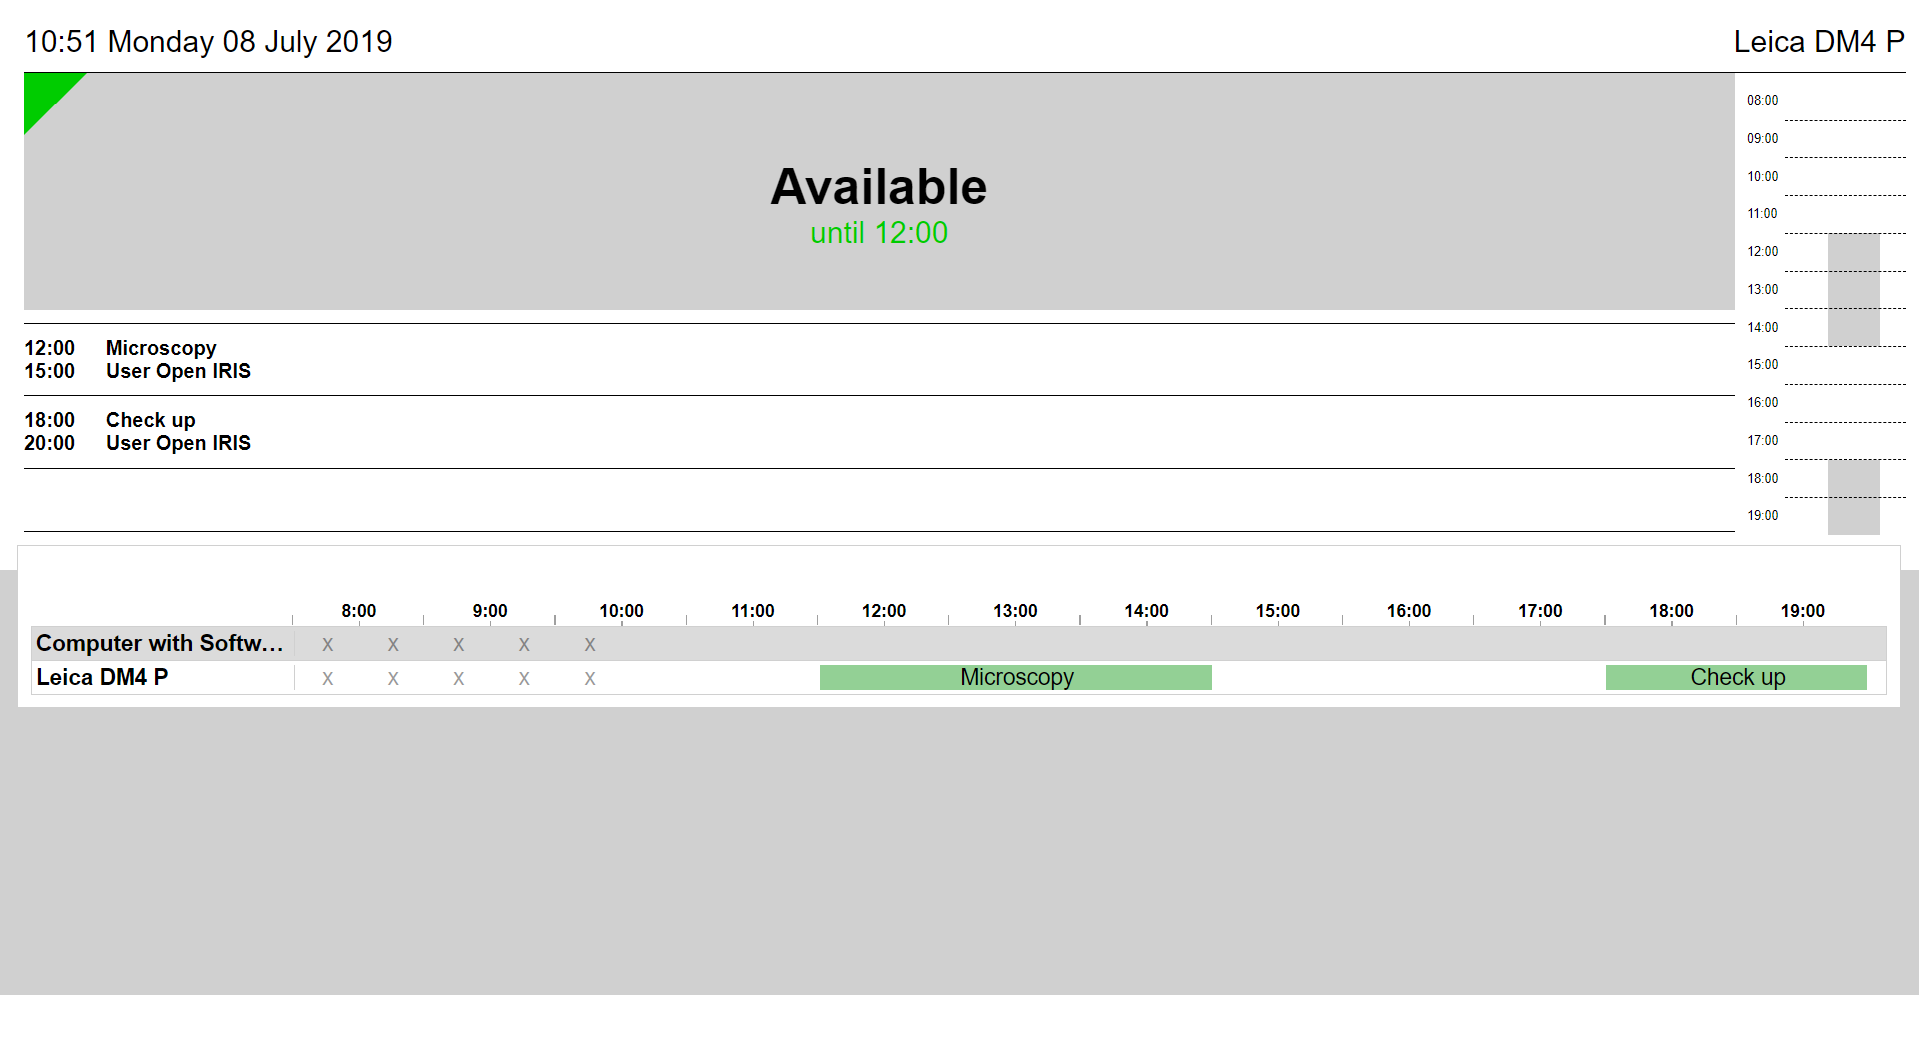
A public web view shows the timeline of certain resources with all bookings on a website that refreshes automatically. This could look like this:
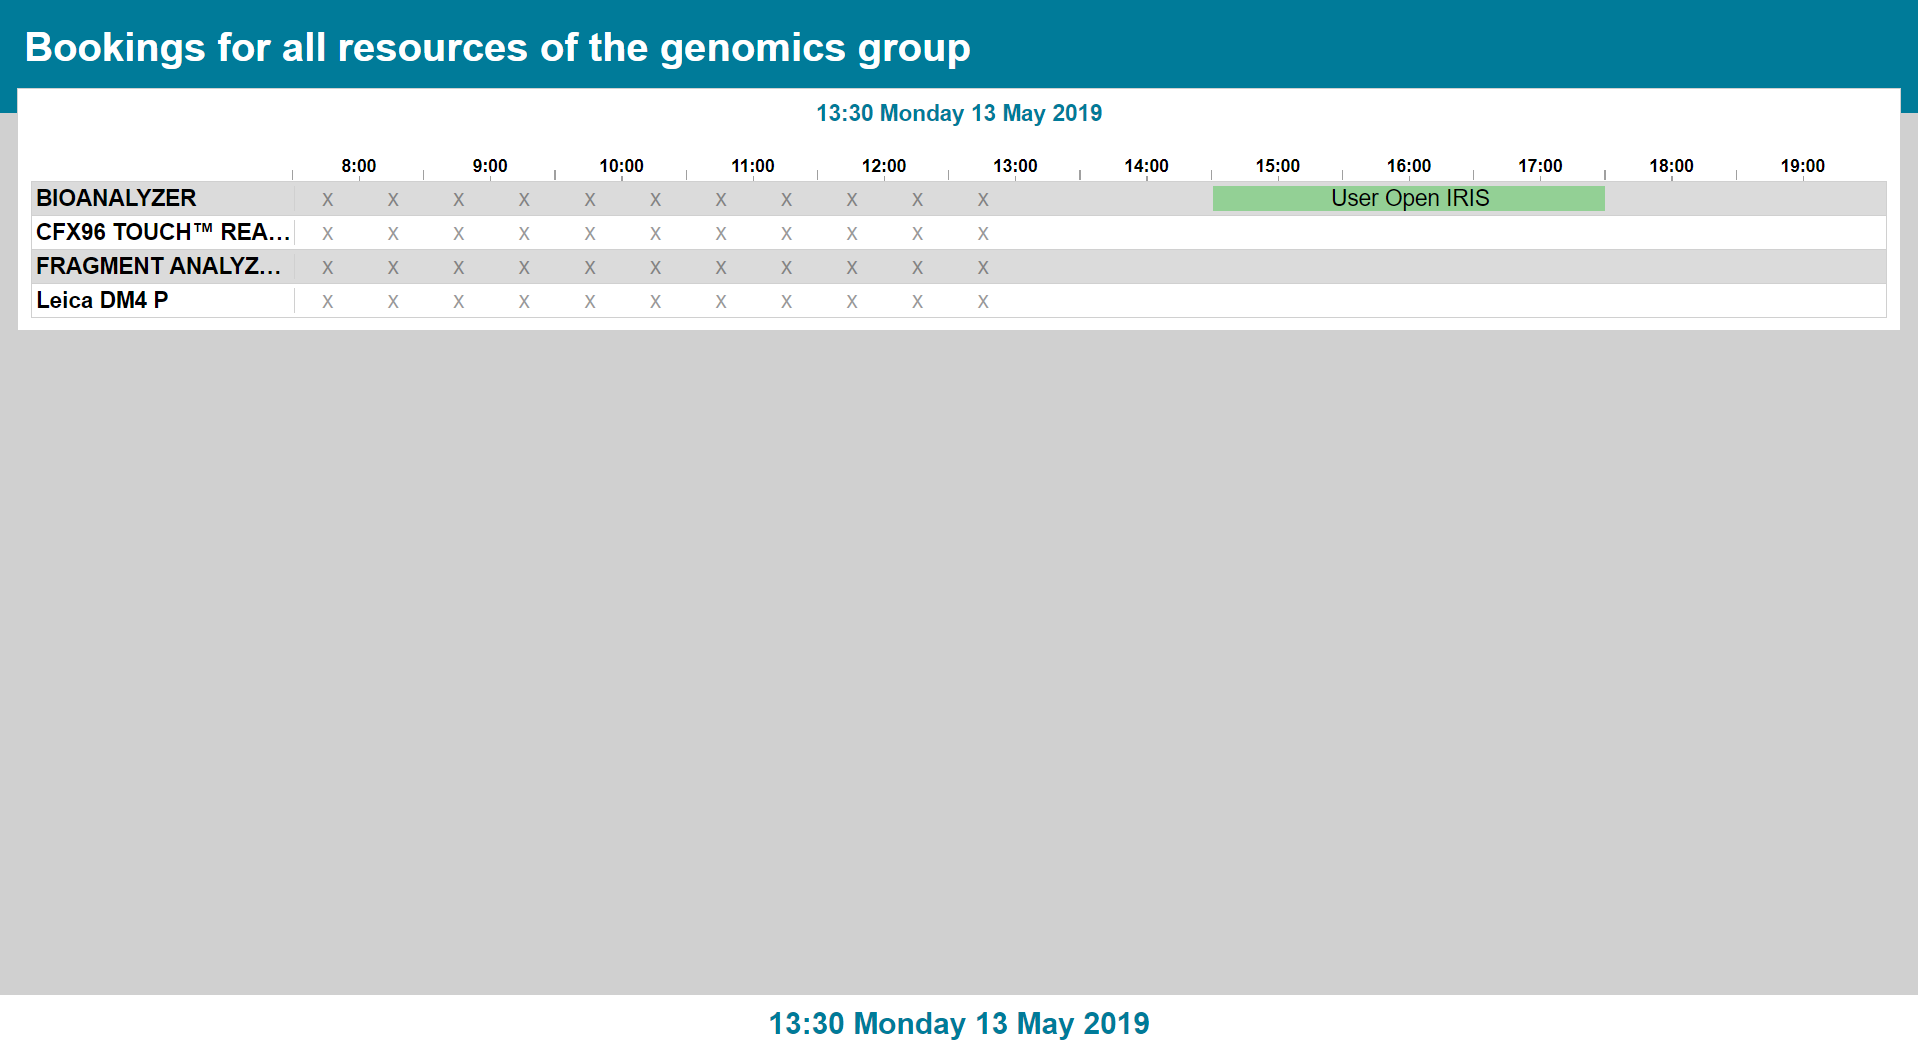
To create a public web view you need to select the type "Web". Now another new window will open where the web view can be created.


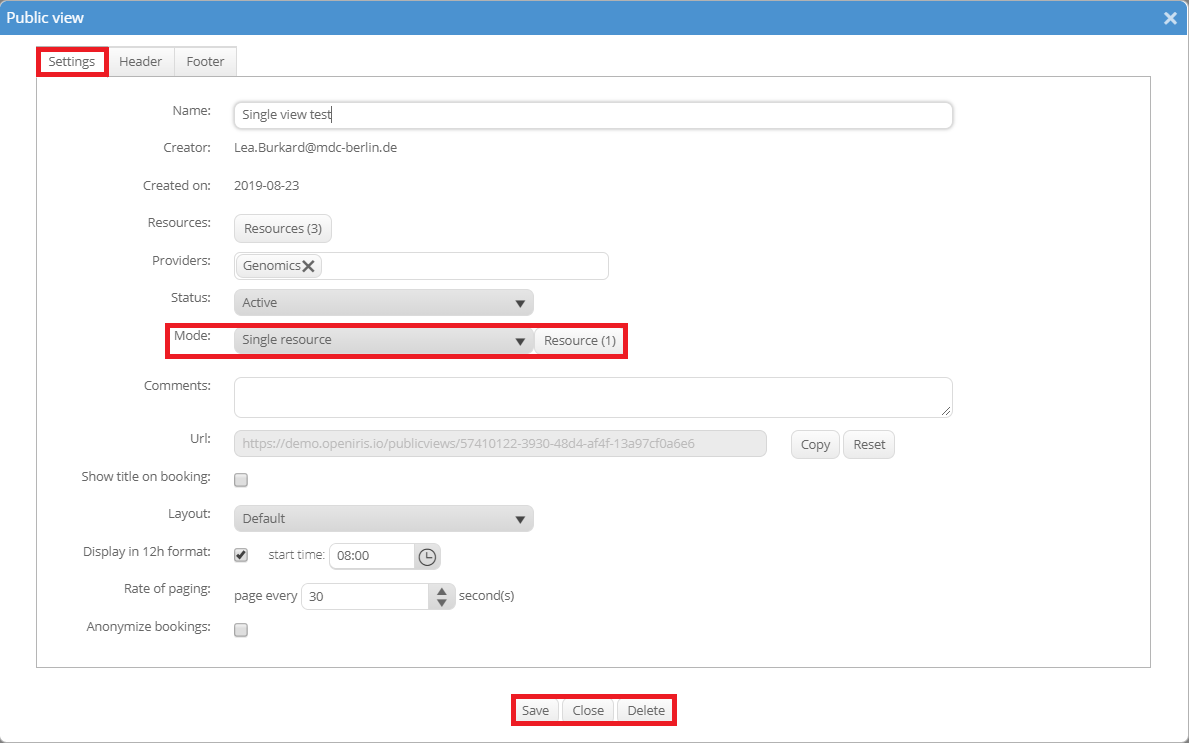
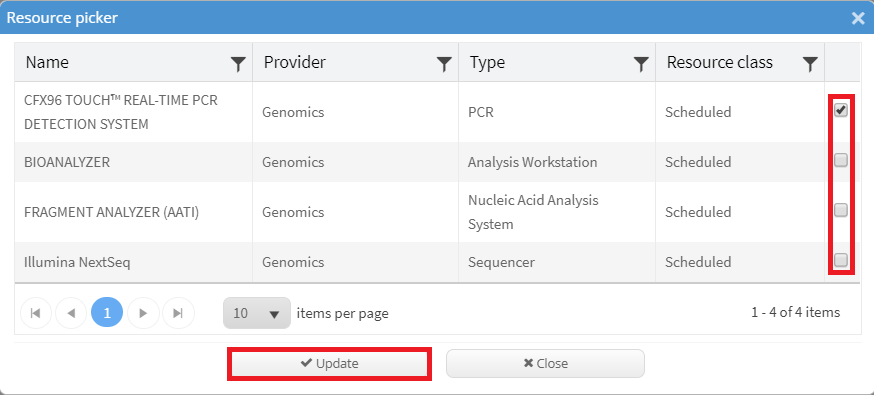
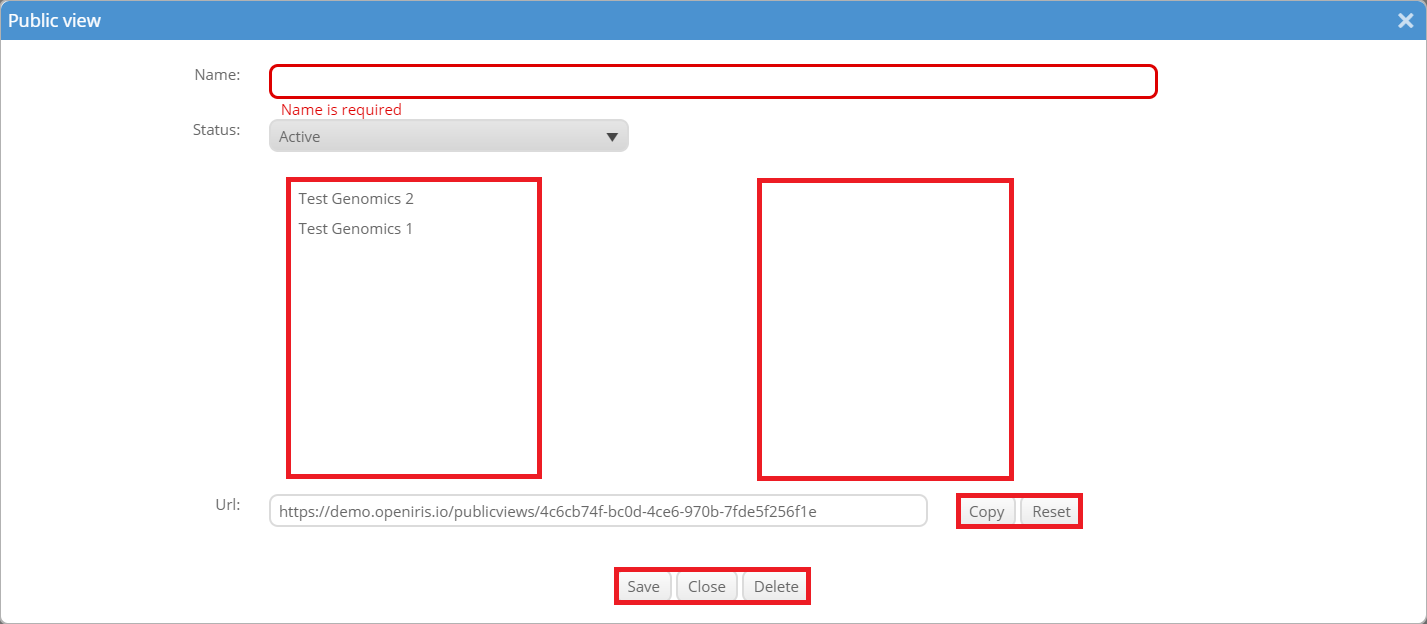
It is necessary to fill out the name and to add resources to the web view. Additionally, you can add other providers you are an admin of and afterwards their resources. The status can be set to active (website accessible) and disabled (website not accessible). You can enter comments which will not be shown anywhere and are just for your personal information. Additionally, you can decide whether you want to display the timeline in a 24 hours format or a 12 hours format with a specific start time. Also the rate of paging can be adjusted. Bookings can be shown in the timeline by their username (default) or the booking title (tick "Show title on booking"). It is also possible to show bookings anonymized, then only the bars without text will be shown.
There are three different modes available for a public web view, which can be selected in the respective dropdown menu:
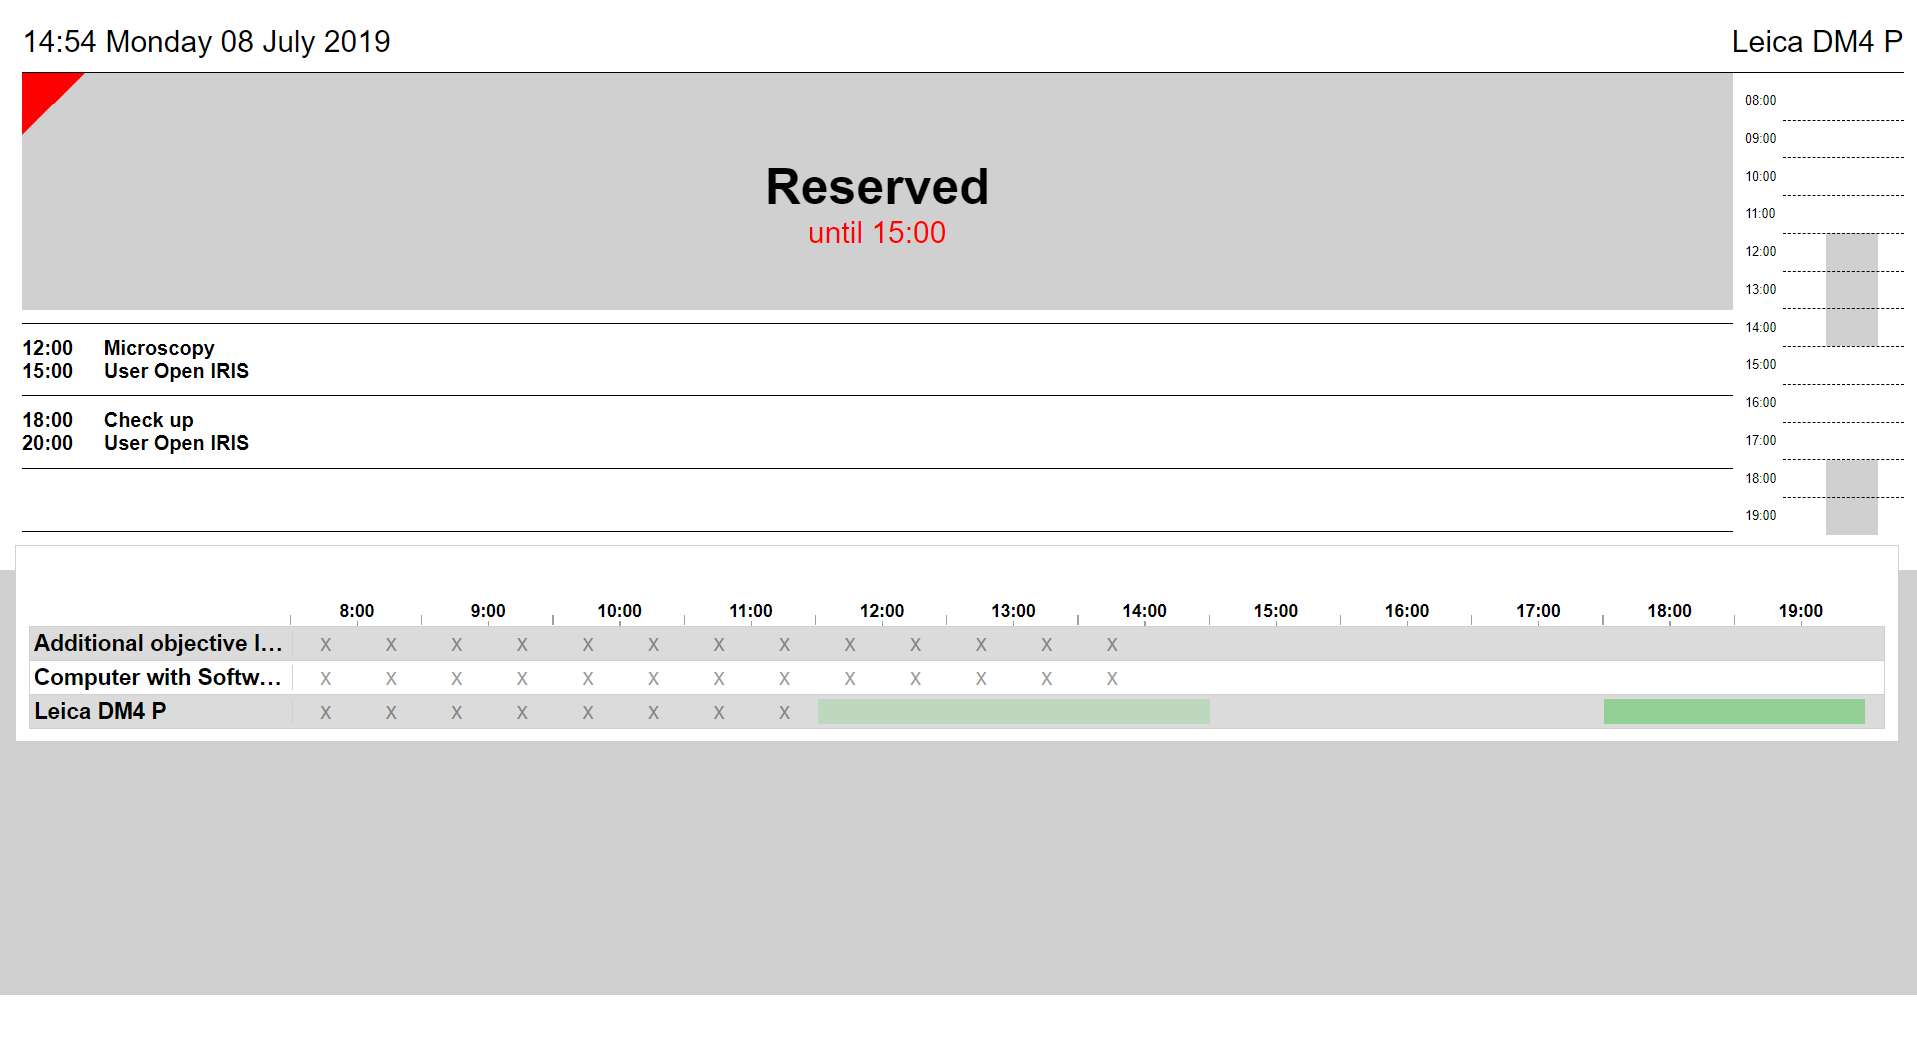
- Normal: The normal web view will be displayed as seen above.
- HTML only: Option to display HTML instead of the timeline. An additional tab "Body" is created, where the admins can enter messages for the users (e.g. if an instrument breaks). This body will be displayed in the center of the view while the timeline is moved to the footer section.
- Single resource: A single view will be creates (as explained later in this article).
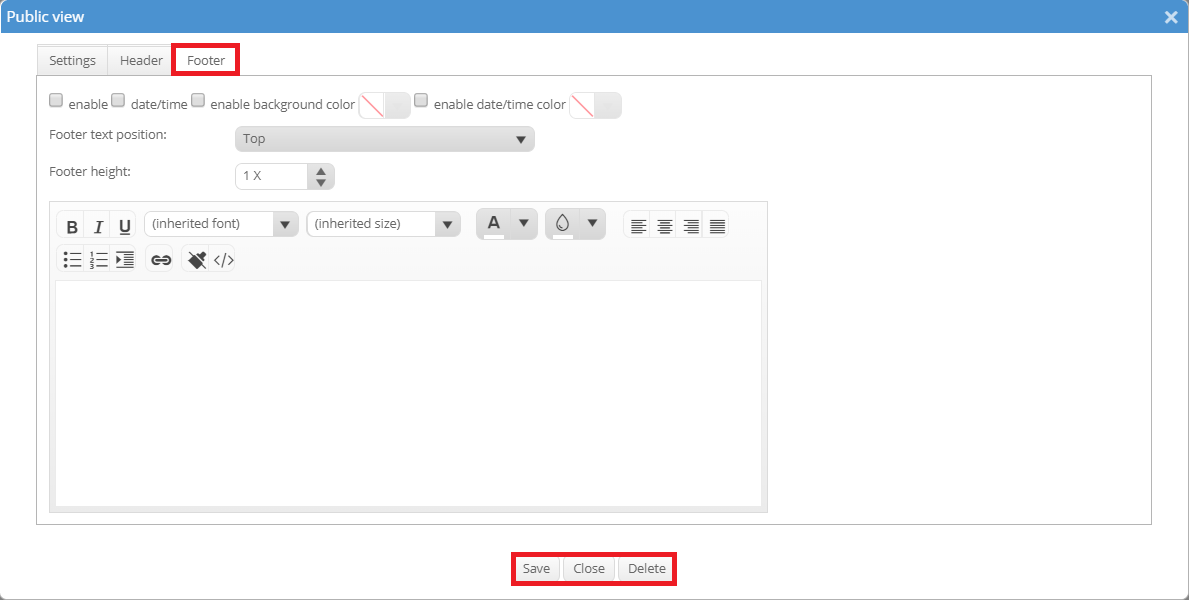
You can also personalize the header and footer of the web view in separate tabs. Both need to be enabled (tick "enable") if you want to use them. In the large field you can enter and edit the displayed text. You can also display the time and date (tick "date/time"), enable a background color and a date/time color. Text position and height can also be adjusted. To create the web view click "Save". As always "Close" will just close this window without saving any information. "Delete" will delete this public view. After you created this web view you can display it by copying the URL and inserting it into a web browser. "Reset" will reset the link and generate a new one. Please note that the old link will not work anymore afterwards.
Single view
When editing a public web view (not a web multi view!) it is possible to select the mode "Single resource". Now you are able to select one resource for the single view. It is not possible to select more than one resource.
After selecting a resource for the single view and saving the changes in the settings, the look of the web view will change. All resources which were selected in the settings tab will still be shown in the timeline of the web view. But the header now features a calendar for the single resource. There all of today's bookings are listed with the booking title and the user's name. Additionally the header gives some information about the current availability of the resource.
Web (multi)
After creating at least two public web views for a provider it is possible to create a web (multi) for this provider. A web (multi) contains multiple web views and switches between them every 30 seconds. The multi web view requires a title and all pre-created web views, that should be displayed need to be put from the left into the right column by drag and drop. The link can then be opened by inserting it in a web browser after the web (multi) was saved.
iCal
You can also generate an iCal feed for selected resources with the public view feature. An iCal feed is a standardized format for exchanging calendar data. To create an iCal feed you need to select the type "iCal". Now another new window will open where the iCal feed can be created.
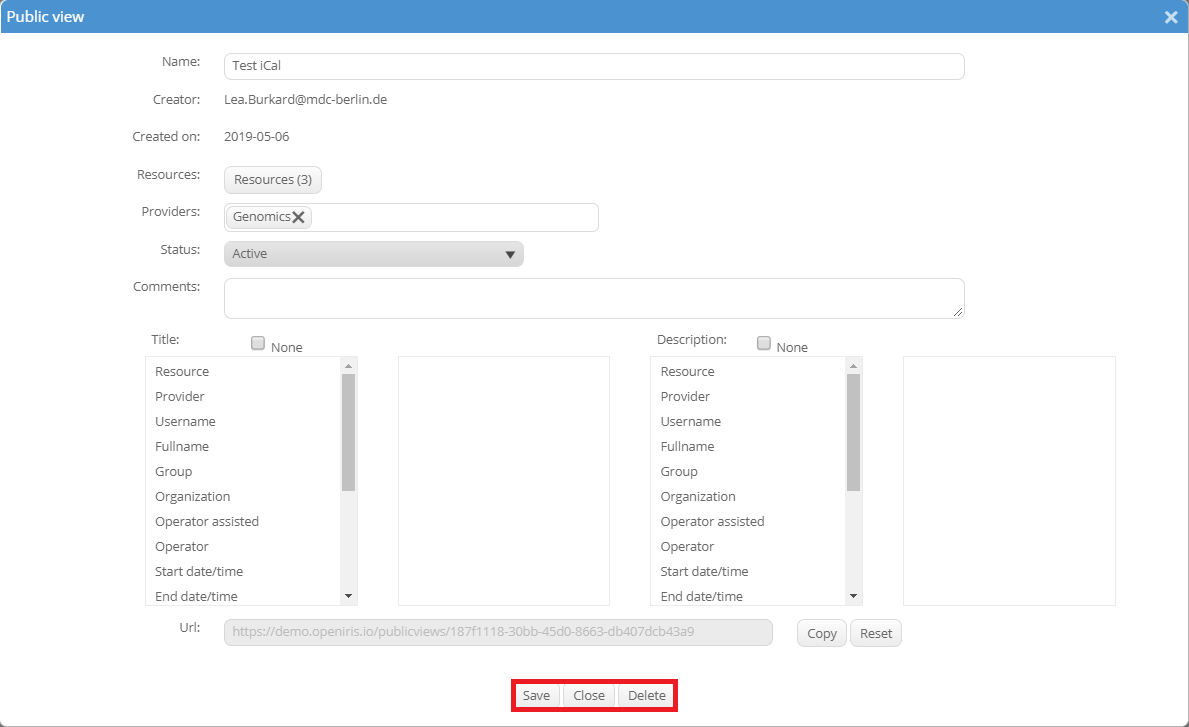
It is necessary to fill out the name and to add resources to the iCal feed. Additionally other providers you are an admin of can be added and afterwards their resources. The status can be set to active and disabled. You can enter comments, these will not be shown anywhere. Now you can decide how the calendar entries should look like. There are several different fields to choose for the title or the description. Just click on them with the mouse and drag them into the empty column next to it. If you do not want a title and/or description just tick the field "none". To create the iCal feed click "Save". As always "Close" will just close this window without saving any information. "Delete" will delete this iCal feed. To subscribe to an iCal feed you need the URL. "Reset" will reset the link and generate a new one. Please note that the old link will not work anymore afterwards.
Import an iCal feed to Outlook
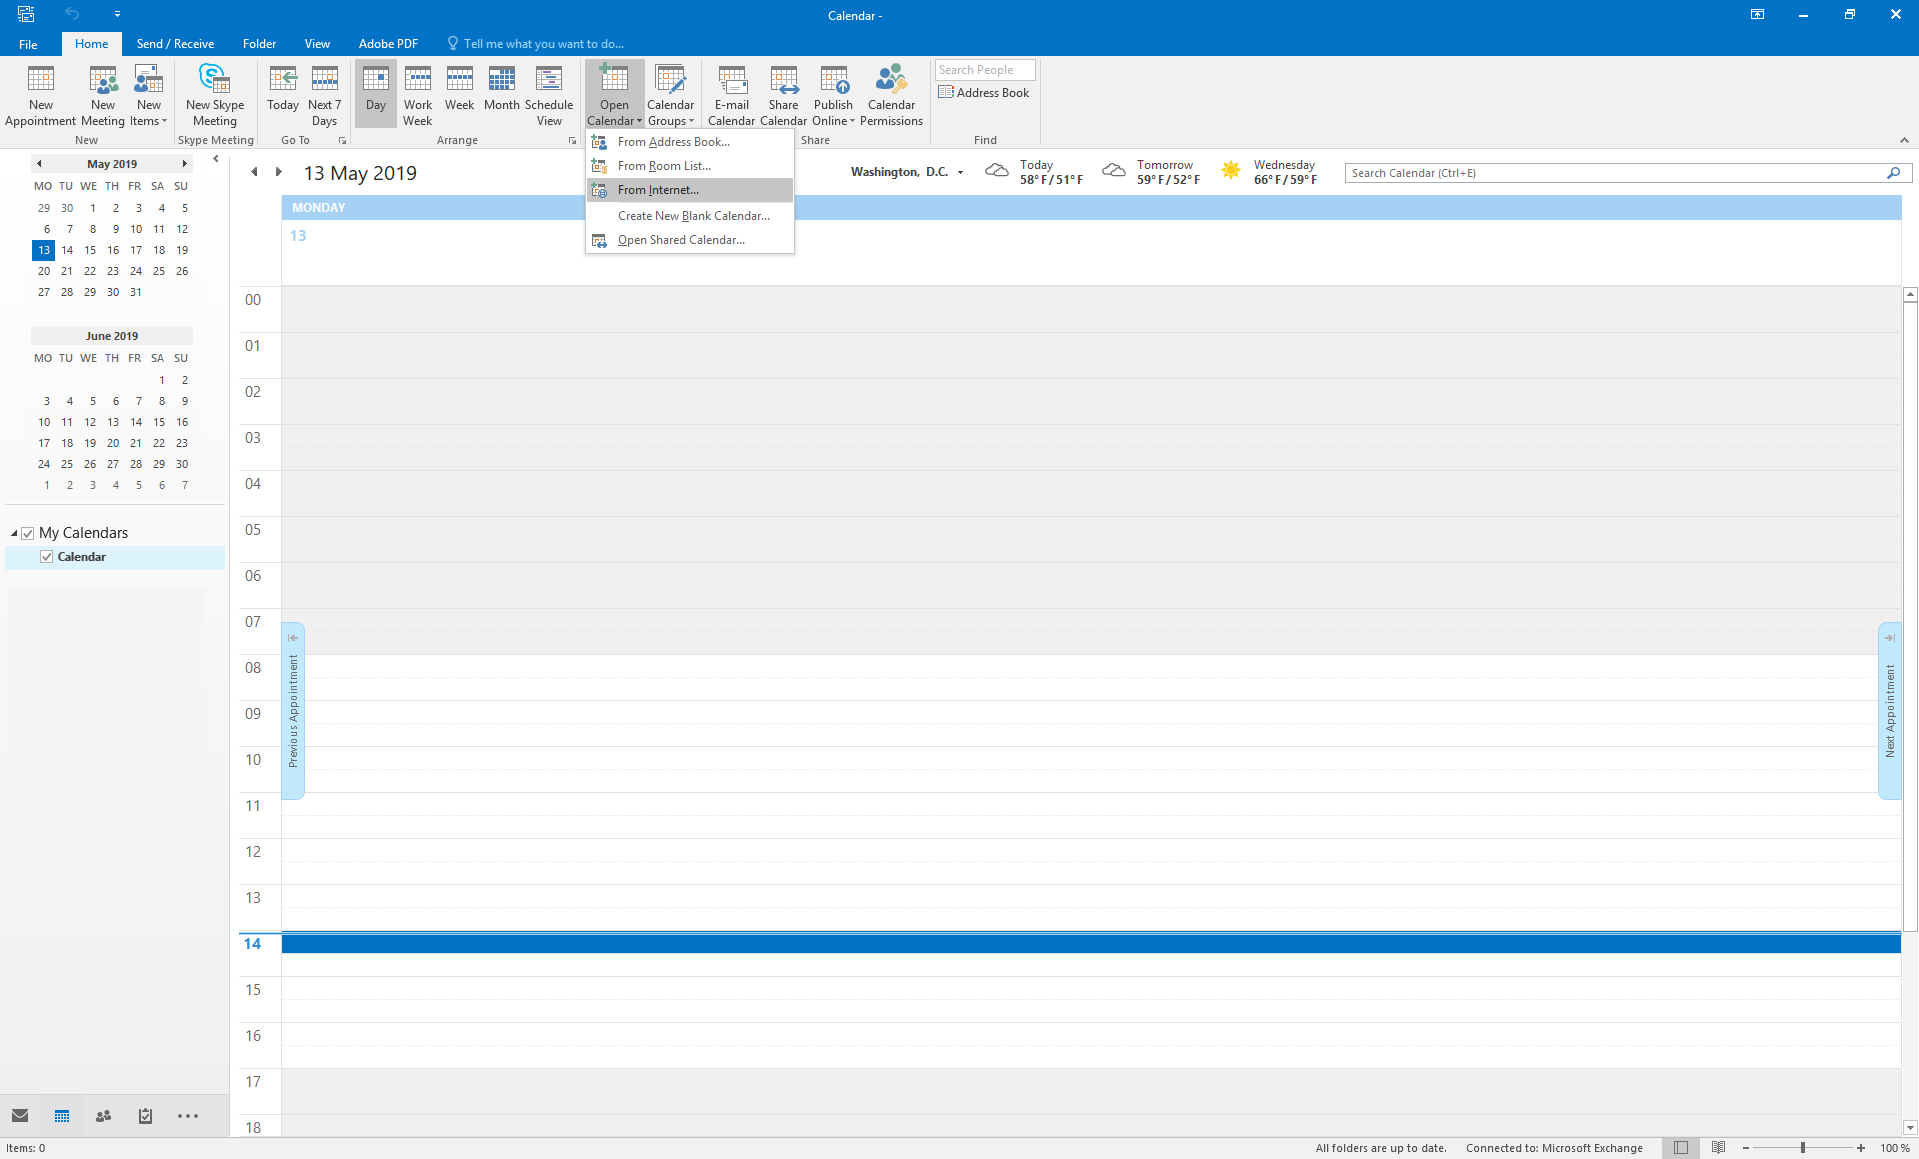
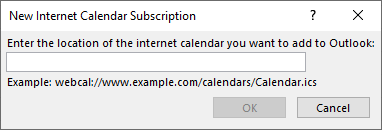
To import an iCal feed into an Outlook calendar you need to copy the link. In Outlook you need to choose "Open Calendar" and then "From Internet...". Now a new window will open where you can enter this link. After clicking on "OK" a new calendar will be added to your outlook calendars with all bookings of the resources of the iCal feed. The calendar will be updated automatically if bookings get changed or cancelled or new bookings are made.